Games and Graphics Level 3
Hello and welcome to the section of my website dedicated to my work done during the Games and Graphics Level 3 course at Preston College.
Here you can find all of the projects that I have done, along with details on how I got there.
Contents
Maya Introduction
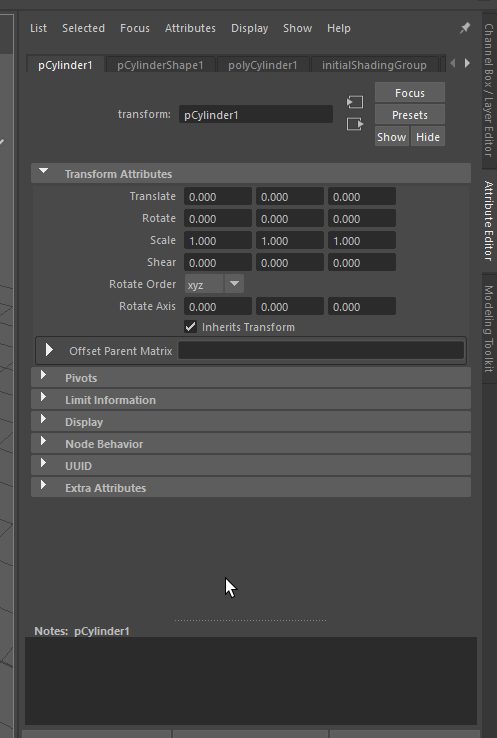
Attribute editor shows all the attributes of an object, such as size, position, texture and shape info.
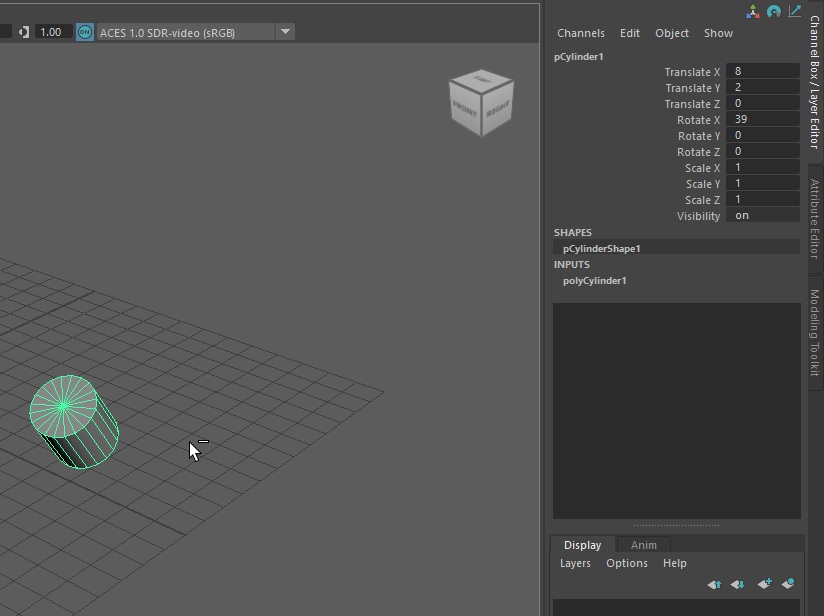
The channel box contains simplified information without objects for moving, rotating and scaling.
To navigate hold ALT+Left Click to orbit, ALT+Middle Click to move, and ALT+Right Click to zoom, or use the mouse wheel.
F – Focus on an object, A – see all in scene
Move by clicking the appropriate arrow, the centre box allows for free movement, and the squares will lock movement into two of the three axis.
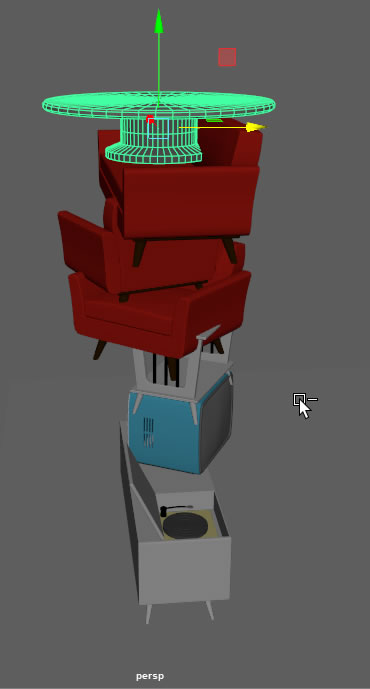
Rotate tool (E) – Rotate in all 3 axis by using the red, green and blue rings, click in the middle to have free rotation, the outer blue ring rotates according to the camera position.
The Scale Tool (R) mainly use the centre block to scale in proportion. You can scale using any axis, much similar to the move tool.
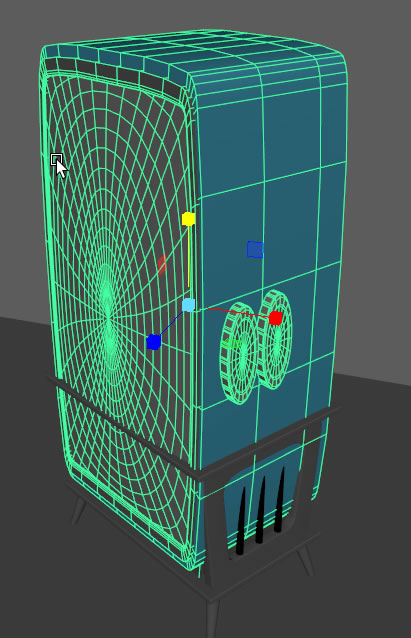
To select a loop (face loop or edge loop or vertex loop) click on one face, hold down shift and double click its neighbour.
Sub Divisions
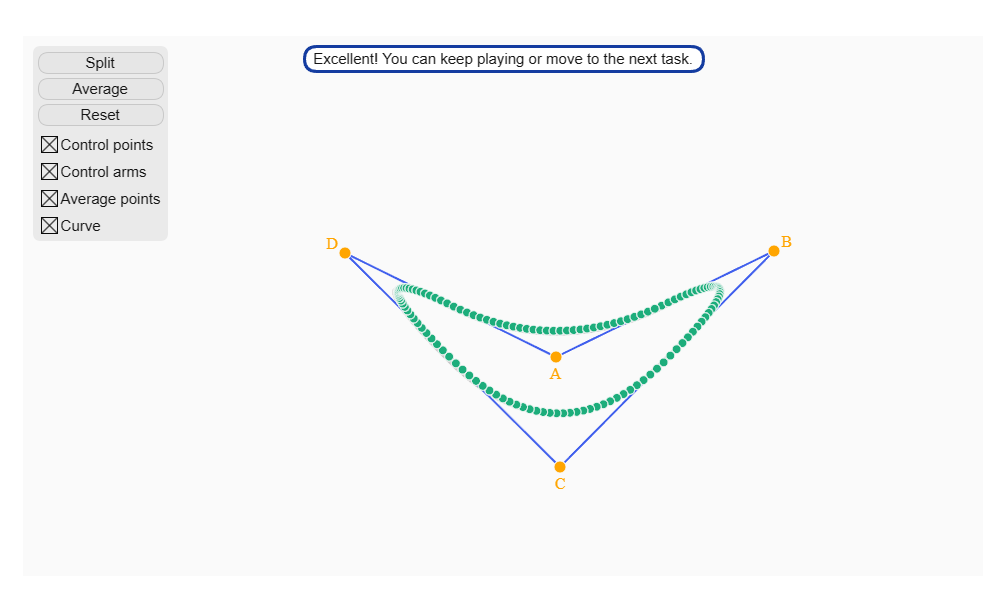
I split and averaged the points until I was able to change the shape into the mouth shape, it was a smooth shape because of how many points there are.
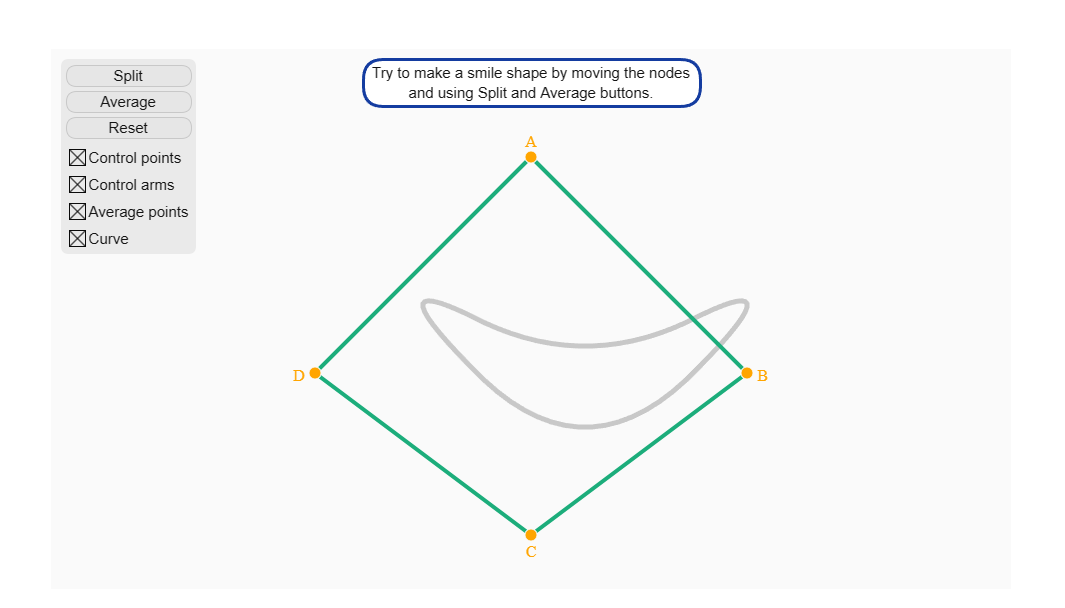
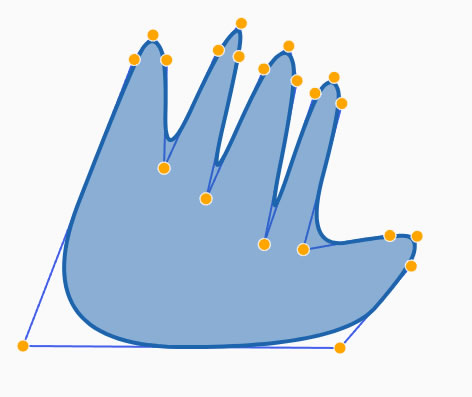
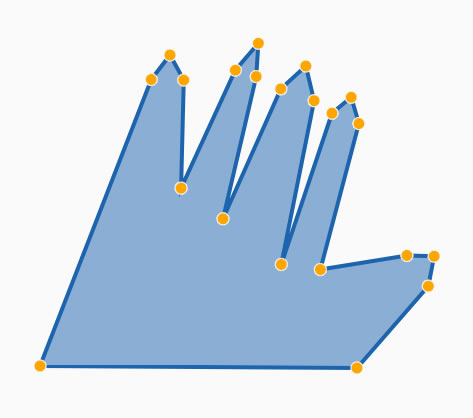
I then made a hand shape and used sub divisions to smooth the lines and curves. Whenever there is a change in direction, I add another point, which adds more control over the shape.
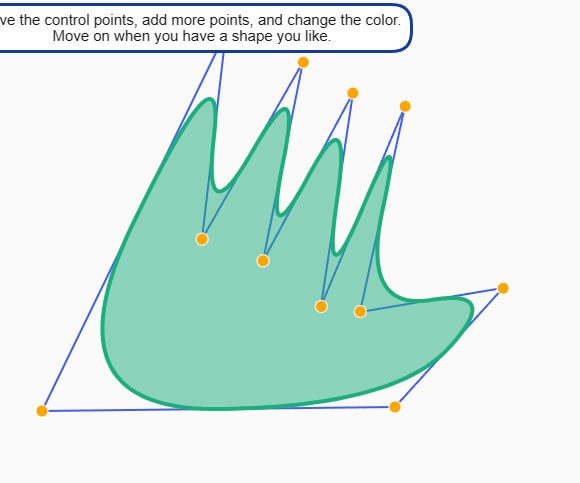
I then added extra points to the fingers to give more control over the shape
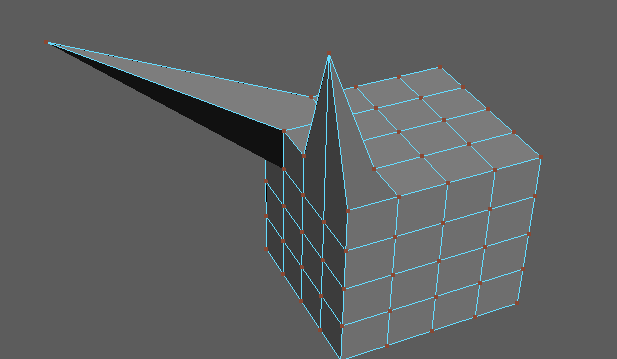
Here is one that isn’t subdivided
Here are 3 cubes, they are divided.
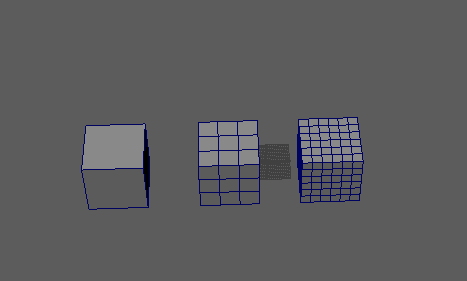
Pressing 3 on the keyboard will subdivide, meaning the edges will be smoothed out.
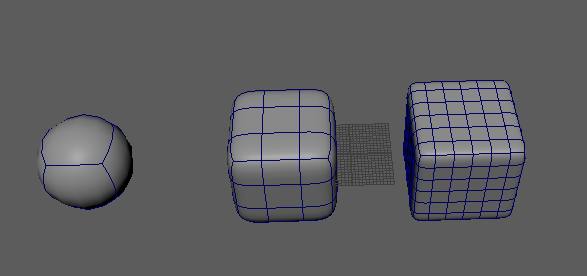
Using the multicut tool, you can easily add subdivisions to just the outer faces of the shape instead of to all faces, even ones that are unseen.
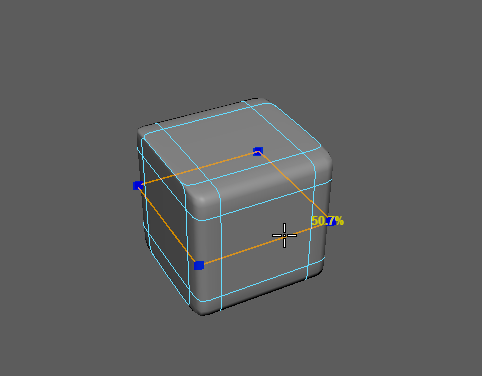
Next I made some more divisions snapping to the middle by using CTRL+Middle Click.
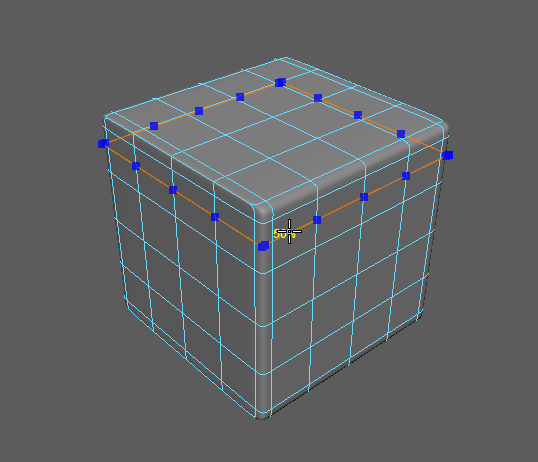
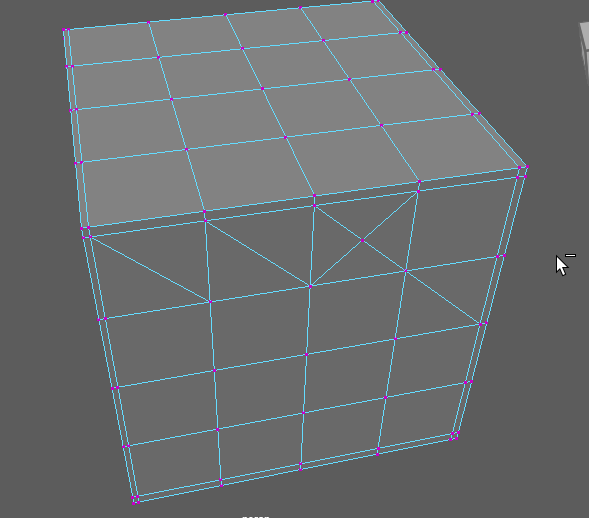
You NEVER want to use triangles, this can cause renders to mess up and game engines to crash. Always work in quads (squares) when possible.
Lamp
Using the processes described above, I made what at least resembles a lamp.
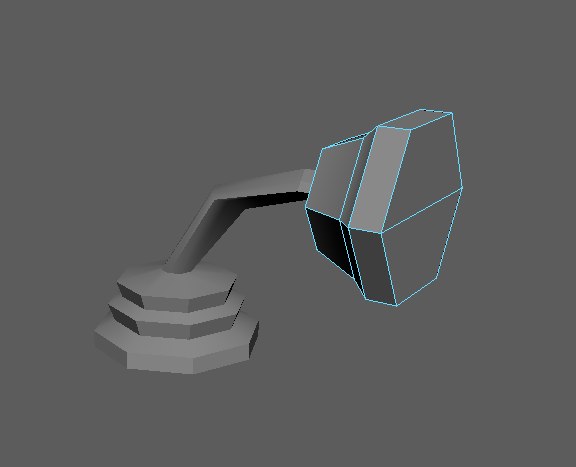
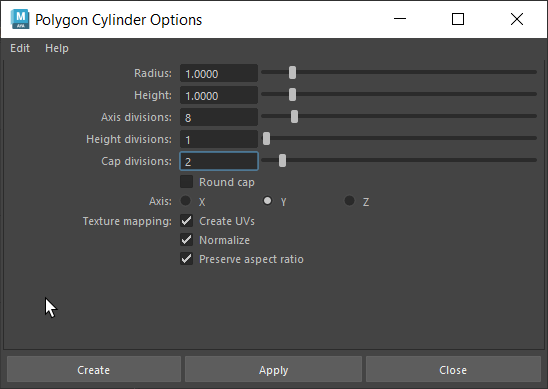
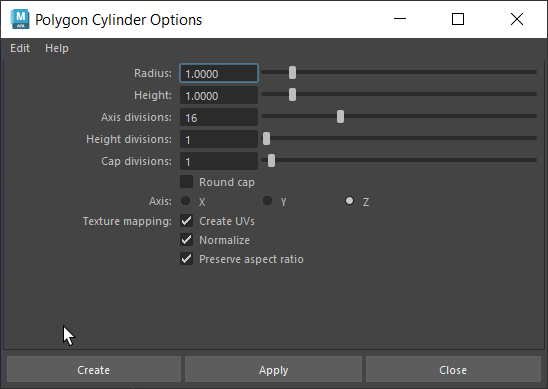
Next I made a cylinder with these settings, and then adjusted each loop’s scale to make it look more like a lamp.
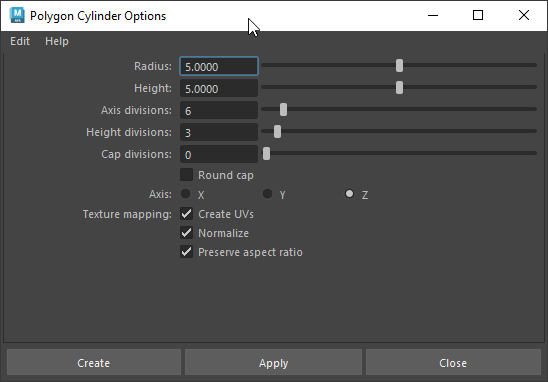
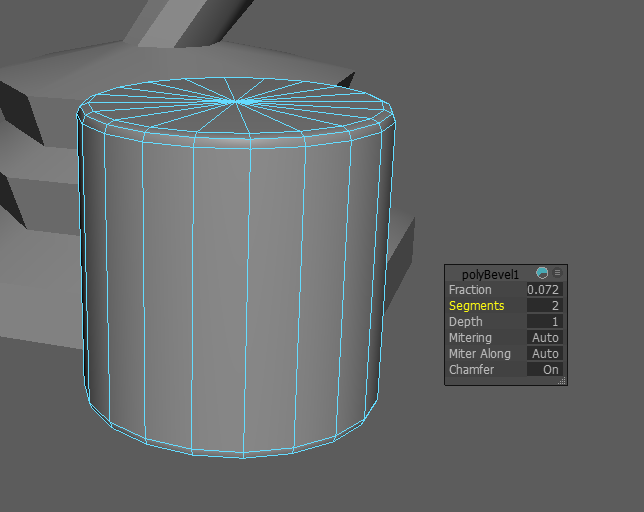
I then used the Bevel Tool [CTRL + B] to create smooth edges on a new cylinder which will be used for a bulb for the lamp.
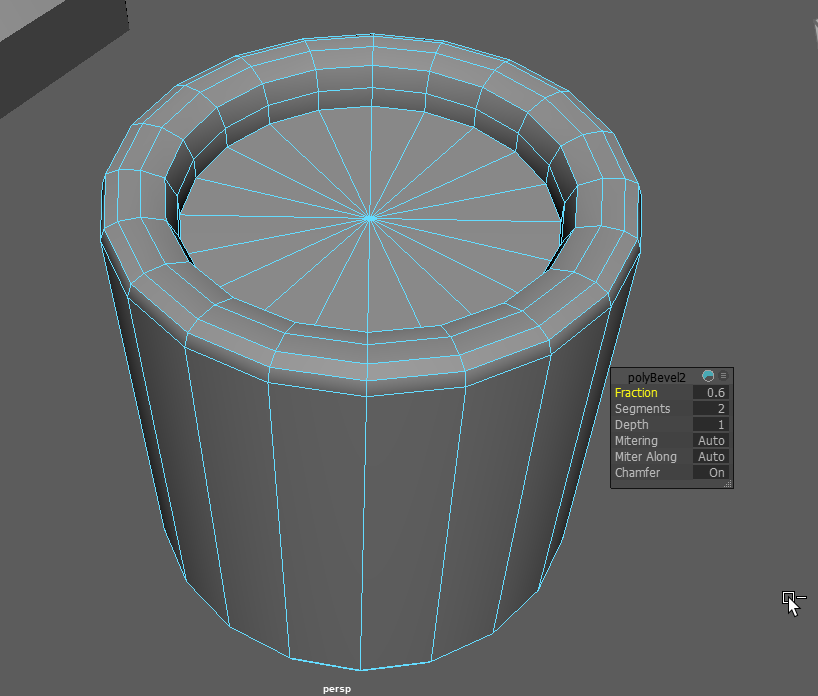
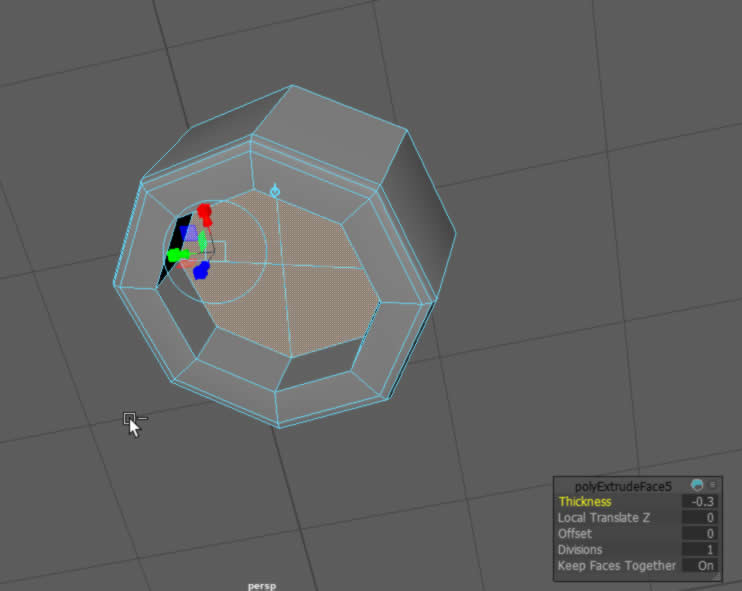
I have extruded the centre inwards and then bevelled the edges to make them smoother.
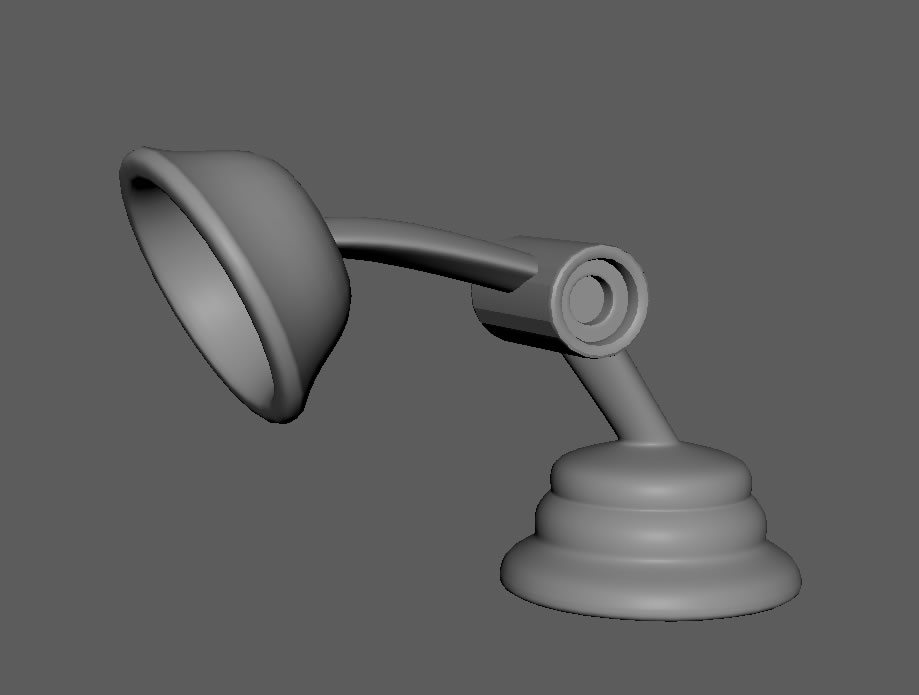
Here is the finished lamp model.
Chess Piece
To insert a reference image on Maya, first you need to put it in the sourceimages folder located in the project folder. You then need to create a new image plane and select the image from the sourceimages folder.
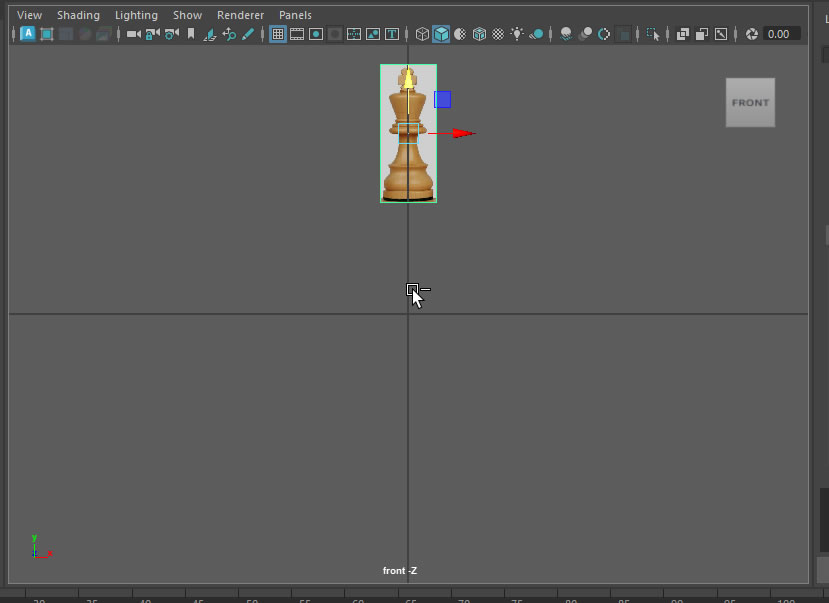
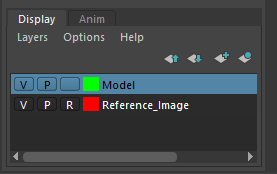
I then created a new layer and added the chess piece to it and marked it as a reference layer. I also created a model layer which will be the one we work on.
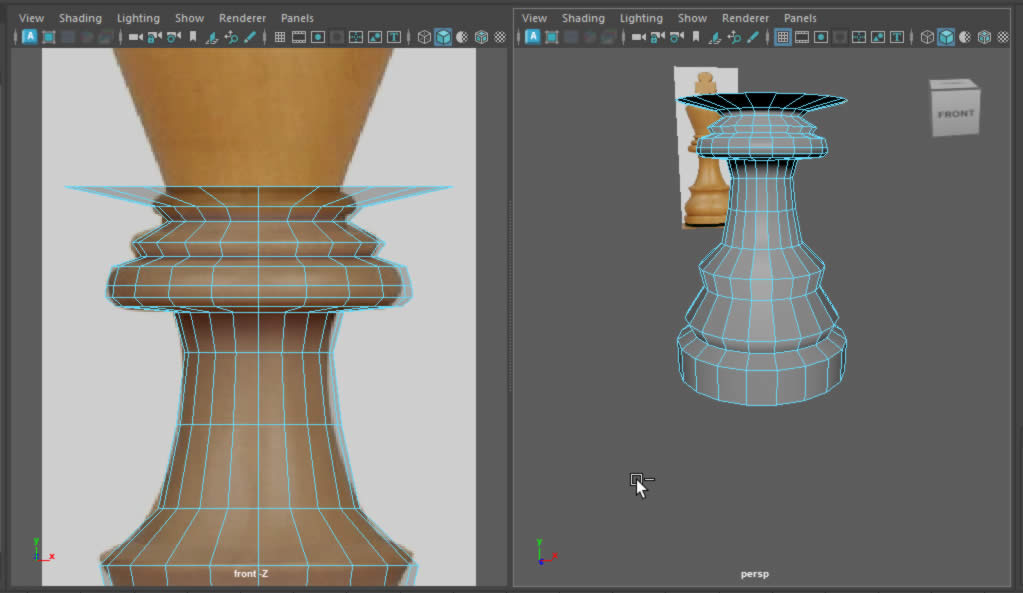
I have been creating edge loops and bringing them in and out and to create the curves required to make the model look like a chess piece.
Here I have cut up the top to make it into many 4 sided shapes instead of the ngon shape it was before.
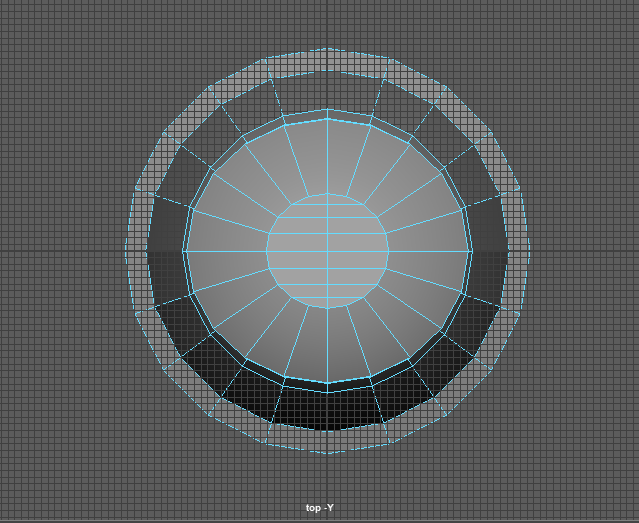
I have added the top piece, although slightly wonky, and cut out a space in the top ready for the cylinder shape
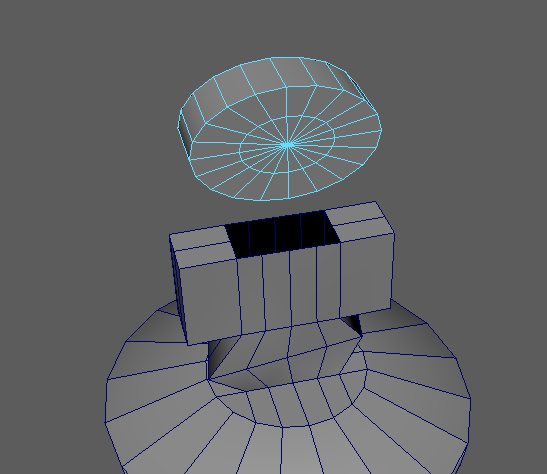
Next I have cut out the bottom of the cylinder ready for them to combine them.
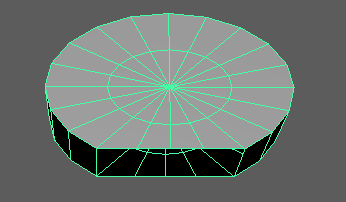
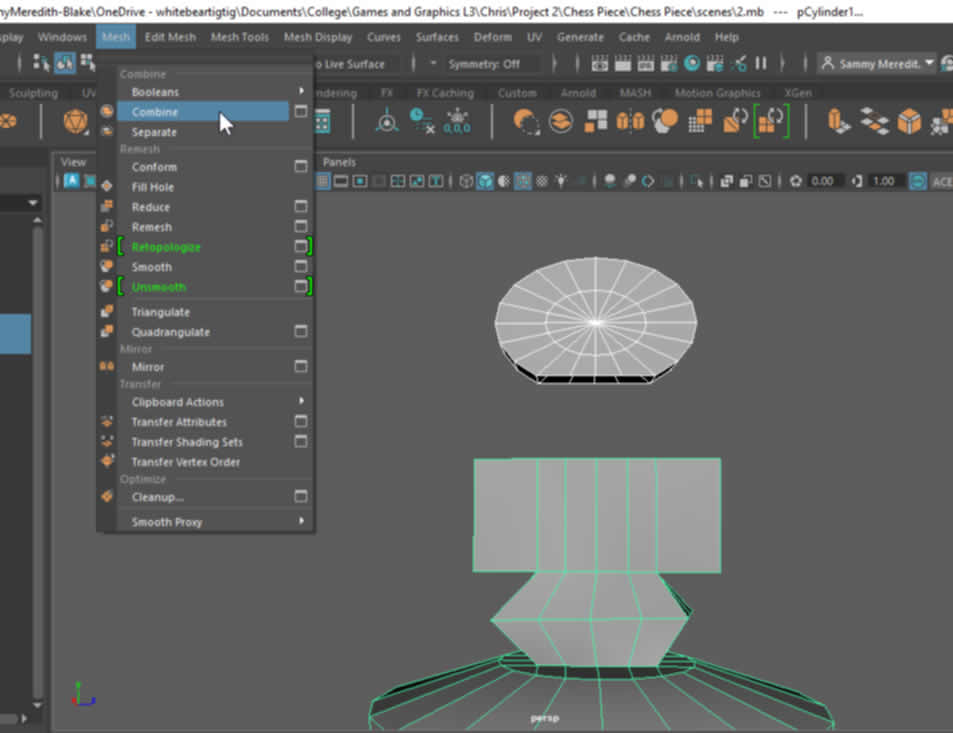
Now I have combined them by selecting the two objects, going to mesh and then combine.
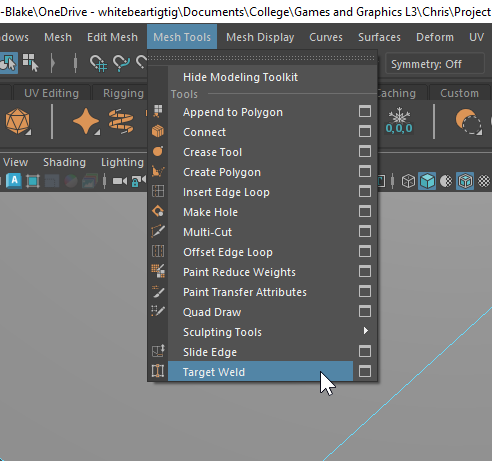
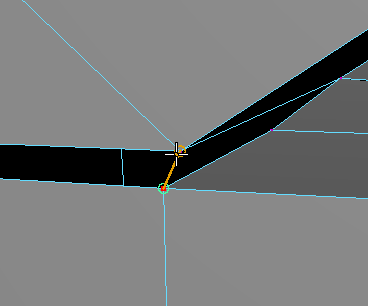
Next I have used the Target Weld tool when in Vertex mode to combine all of the points, this completes the process of combining the two objects.
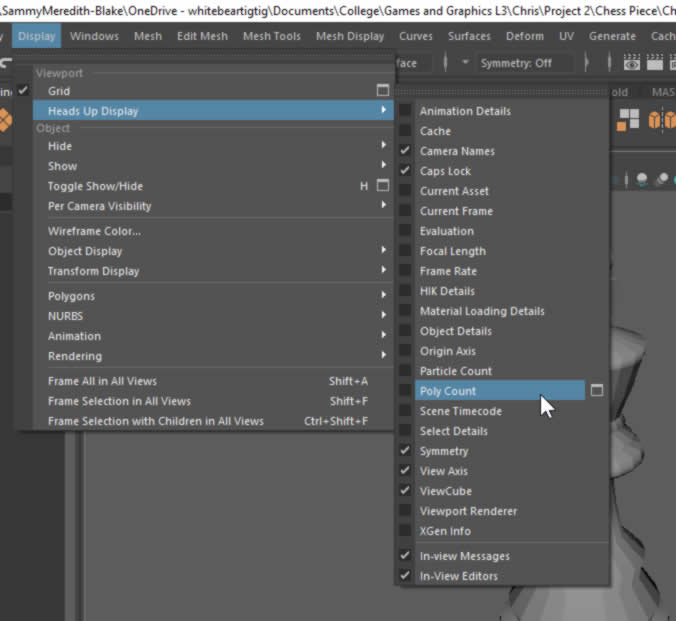
To enable poly count, go to display, heads up display and then poly count.
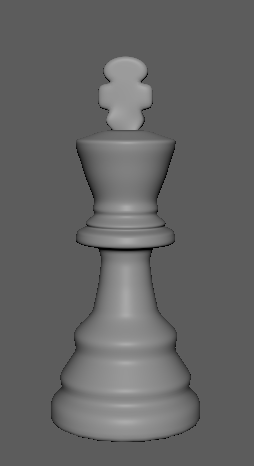
Here is the final chess piece model
Hostile Environment
What are the elements that make an asteroid a particularly dangerous and hostile environment to work in?
The hostile environment of space
Above the insulating atmosphere of the Earth, spacecraft are subjected to extremes of temperature, both hot and cold, and a significantly increased threat of radiation damage, exposure to extreme heat and cold cycling, ultrahigh vacuum, atomic oxygen, high-energy radiation, and debris impact. Radiation from various sources like Stars can cause damage to cells if unprotected.
The space probe would need protection against all these conditions, along with some potentially unknown dangers such as other creatures. Therefore, all the dangers would affect the design of the probe as it will need shielding against radiation, and debris, along with being able to withstand the ultrahigh vacuum environment.
Assuming that humans would also be travelling on this probe, it will need to have oxygen production and be able to regulate temperature. There will also need to be a way to produce food long term given the distance between Earth and the asteroids they may be going to, along with a way to produce fuel or to run the probe completely off solar energy.
Competition
It may be an unethical practice unless it can be regulated to bring benefits to all.
The mined minerals could be stolen and sold by other companies/Government. The level of wealth required to pursue an asteroid mining venture is concentrated in the hands of a very small number of people.
Competition - is when competing companies are striving to gain or win something by defeating or establishing superiority over other companies. This means that the race to find out information about asteroids could create pressure to put the person or people into a dangerous situation where someone could get hurt.
Competition would be a major problem until space is regulated by governments. This means that probes will need to be fitted with weapons and extra shielding against attacks, along with a stealth mechanism or a way to create a decoy hologram ship.
The only way the other issue of companies/governments stealing from each other would be to have better defenses than the other, or for there to be international laws that prevent such things happening.
The next problem is that only the very wealthy can afford to mine on an asteroid, and there would never be a benefit to the poor, unfortunately it will remain impossible for the poor to run missions like these until costs come down with more efficient processes, which will happen with time.
Hazards of landing and operating on the asteroid
Notable asteroid mining challenges include the high cost of spaceflight, unreliable identification of asteroids which are suitable for mining, and the challenges of extracting usable material in a space environment.
It costs 53-225 million dollars to launch an object out of the Earth’s atmosphere.
It would take minimum 2.6bn for a mining asteroid mission.
Asteroids are not large enough to produce significant gravity, making it difficult to land a spacecraft. The astronaut would sink into the asteroid if they land too hard. Asteroids don't have mass and size to crush together into balls like larger planets do. This means that its surface gravity is too low to be able to walk on.
There are many hazards of landing and operating on these asteroids, mostly related to the lack of gravity on asteroids. This means that humans wouldn’t be able to safely land on one, however, a machine could. A machine would be the best option for mining the resources on these asteroids.
Returning Mined Material
Huge cost in getting spacecraft to the site and bringing equipment with them. Even greater cost transporting material and re-entering material through Earth’s atmosphere. Moon base could serve as a waystation.
Or mining materials in space for use in space – water for processing into rocket propellant.
Returning the mined material from the asteroids to Earth would be extremely difficult and expensive. The best way of dealing with this is to build a space elevator, whilst this is very expensive to do, it is more viable long term than trying to get it through the atmosphere at speed in a probe.
Visual Language of Existing Games
No Man's Sky
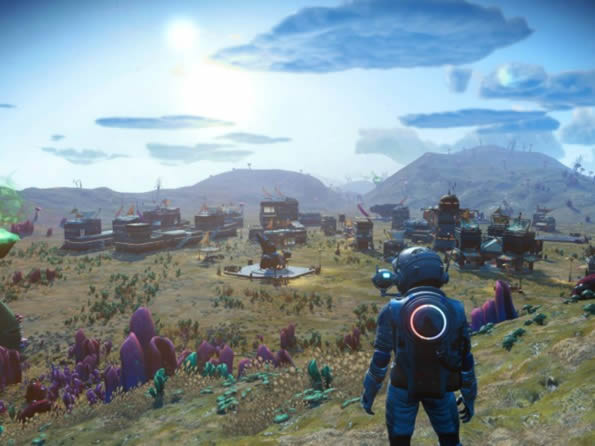
No Man’s Sky is a third person, open world game. The game is infinite with procedurally generated planets and a 30+ hour story.
Based on reviews, the game has great graphics and story but even 4 years after launch, a lot of reviews talk about its mundane and repetitive gameplay as there’s not so much to do after the main story of the game is complete.
Osiris
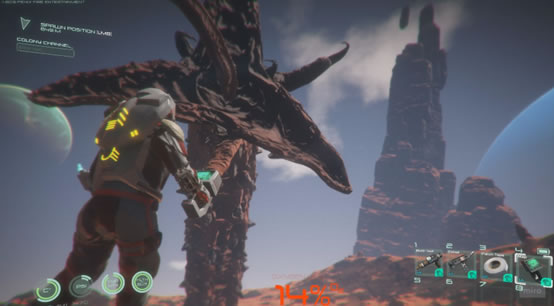
Osiris is a 3D futuristic Sci-fi survival game. It incorporates cinematic beautiful alien like environment with elements of horror and mystery. In the game you play as a mission specialist to build your planetary base, pilotable vehicles, and controllable drones used to explore the dangerous solar system far from earth. I believe this game is aimed at a more 17-34, as the horror aspects of the game could scare some younger players, and the exploring aspects of the game could appeal to an older audience.
Space Invaders
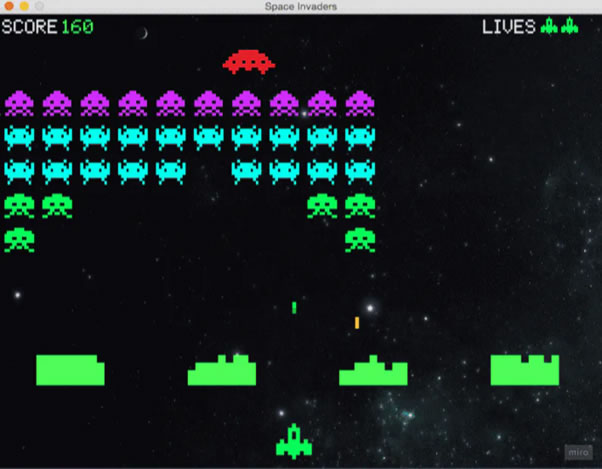
The game space invaders is quite an old game, from 1978. This means that the graphics of this game are not as advanced as most other games you will see. The style of this game is quite retro, it includes enemies that can fire back at the character you’re playing, in a very basic way. This game is not 3d, or realistic, and there is very little detail or shading in the characters themselves, they are just little blocks of pixels that are shaped to give the illusion of characters. This game also looks as if it has been created for younger children, as there are many bright colours and there is no graphics that could be harmful to children. The aim of this game is to pan across a screen and shoot descending swarms of aliens, preventing them from reaching the bottom of the screen. The background is more realistic, it appears to be a solid image of outer space, not animated at all.
Satisfactory
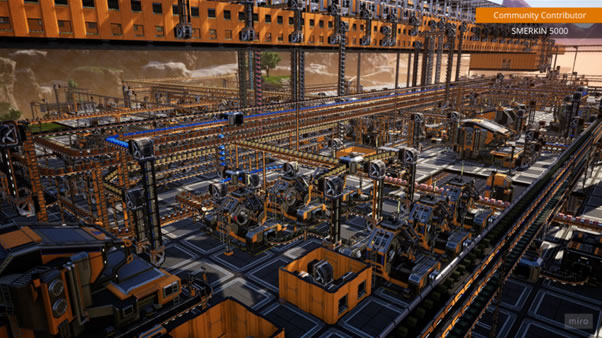
Satisfactory is an open world factory game where you landed on an alien planet. You must create a factory that sprawls across the whole world. there are lots of different materials like iron, copper, concrete, quarts, bauxite, and uranium. the aim of the game is to create a factory that is self-sufficient in terms of power and resources.
Starfield
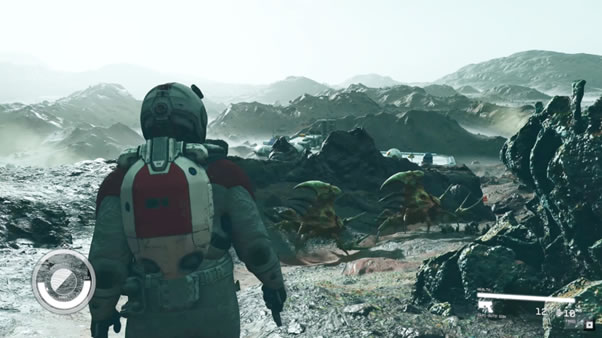
Starfield is aimed at 18–34-year-olds, the game is for exploring space on a multiplayer engine with different tasks to complete for money to buy and upgrade ships. It has realistic graphics to help with immersion. A very large part of the game is the exploration; the travel speed is slow compared to the size of space, making it feel more real and giving a very large sense of scale for the game.
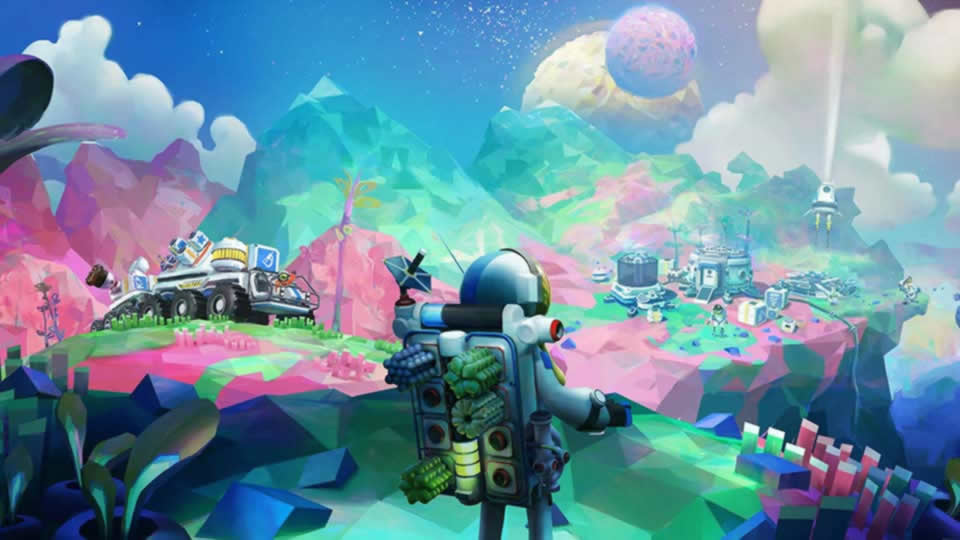
Astroneer
Astroneer uses a cartoony artstyle to convey a fun atmosphere.
Astroneer's gameplay consists of surviving on a planet you have been stranded on, collecting resources and trying to make a rocket to escape and explore other planets. However, there is an overarching gioal in each planet. There is a purple core, once all the cores have been activated, you are able to complete the game, rewarding you with a new colour pallette and suit.
My Game
After researching space related games, mine is going to combine the open world aspect of No Man’s Sky, the horror aspect of Osiris and the resource management aspect of Satisfactory. This will affect the design language of the game as with open world and resource management games, realistic graphics are not as important as in games such as Starfield, which are focused on realism. This means that my game will have a more simplistic/cartoon style of graphics, but with enough realism to accommodate the horror aspect. These space creatures will need to be terrifying. This would make the game aimed at an older audience, likely 17-35.
Lego Figure
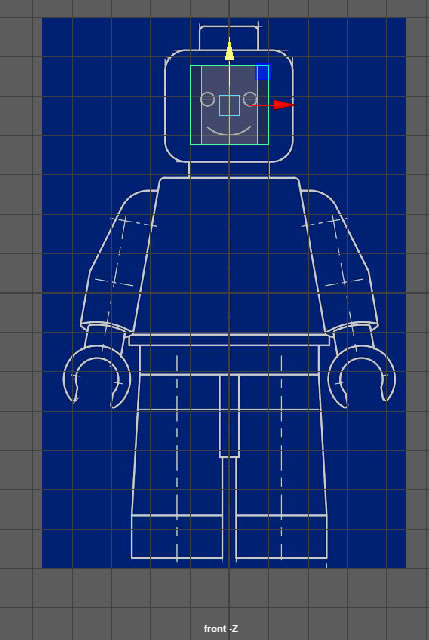
I started off with creating a cylinder with these dimensions, lined it up and globally scaled in the front view, I then extruded (CTRL+E) upwards to create the top part of the head.
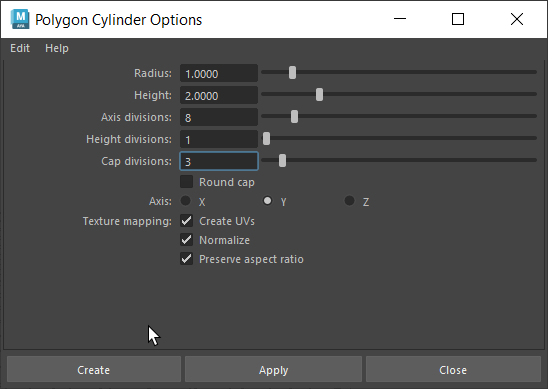
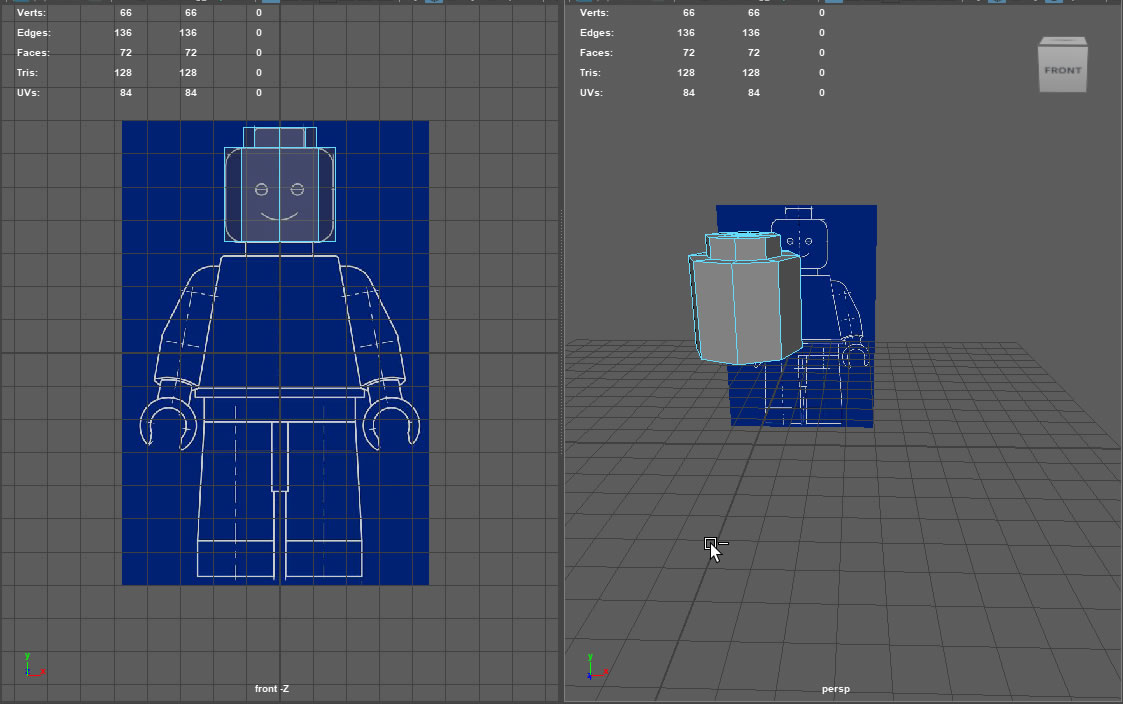
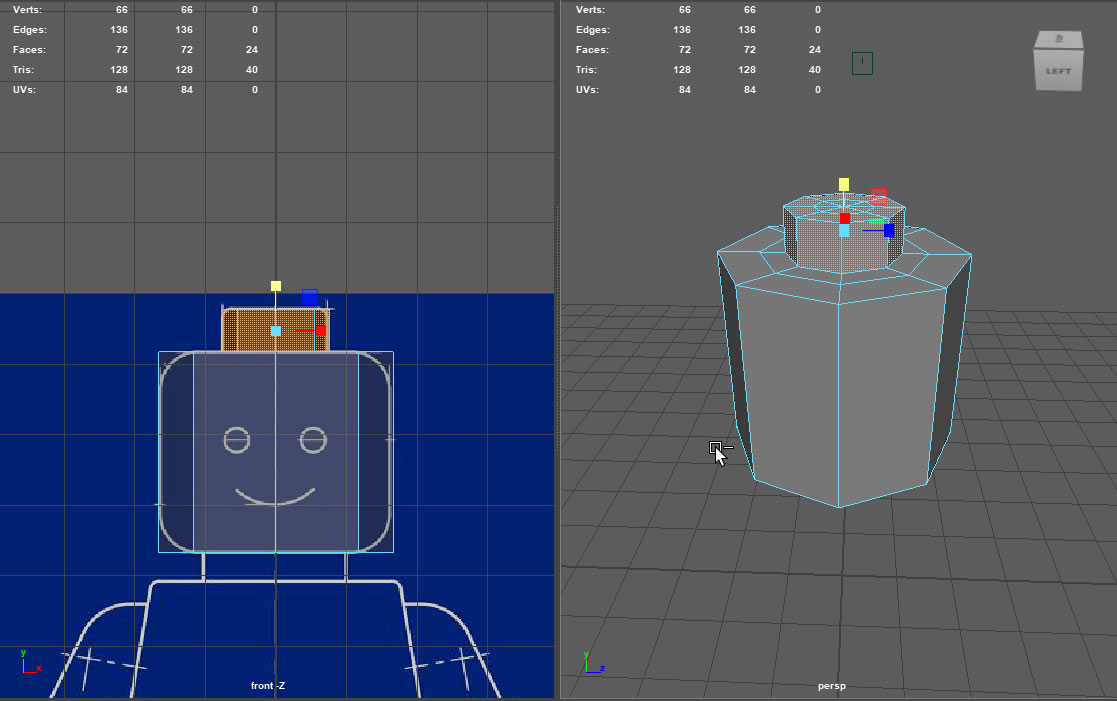
I then added in a neck by extruding downwards and removed triangles.
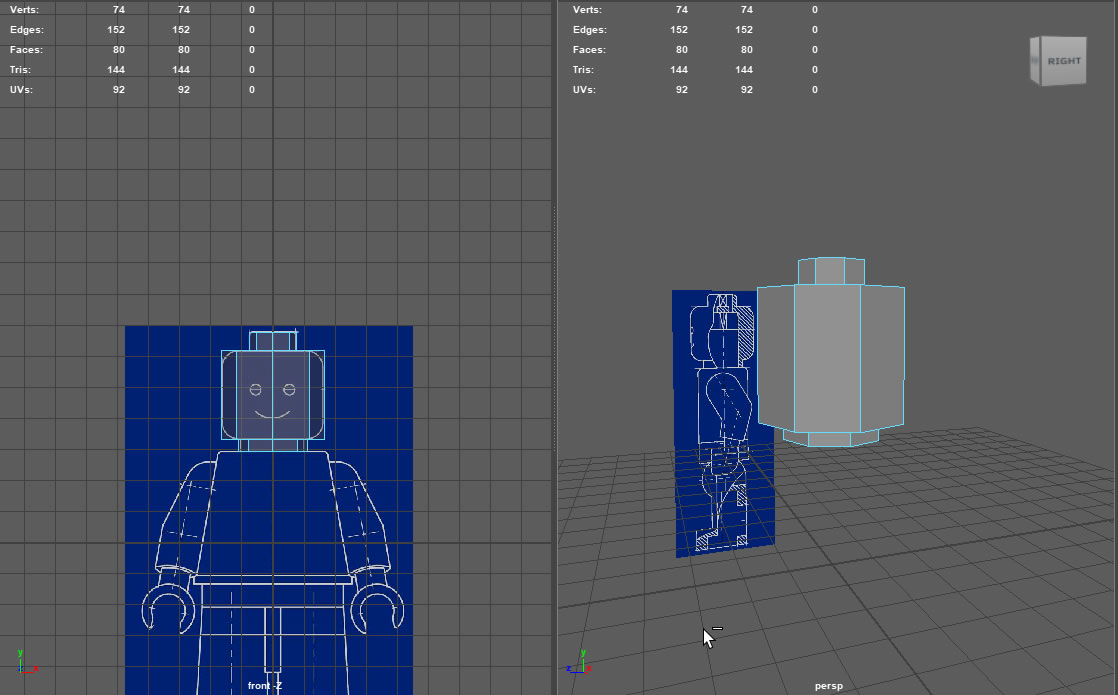
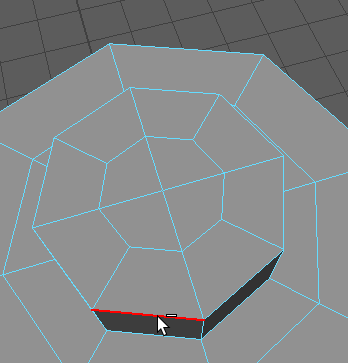
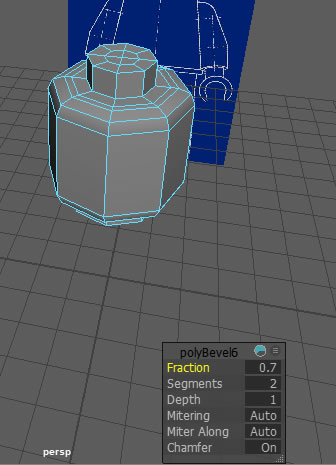
To make the top and bottom of the head smoother, I bevelled the edges (CTRL+B).
There is a quicker way of saving, simply press Increment and Save (CTRL+ALT+S), and it will append the file name with .001, .002 and so on.

I then created a 1x1x1 cube with no subdivisions, having no subdivisions at this stage will make it easier to move it around, we can always add those in later.
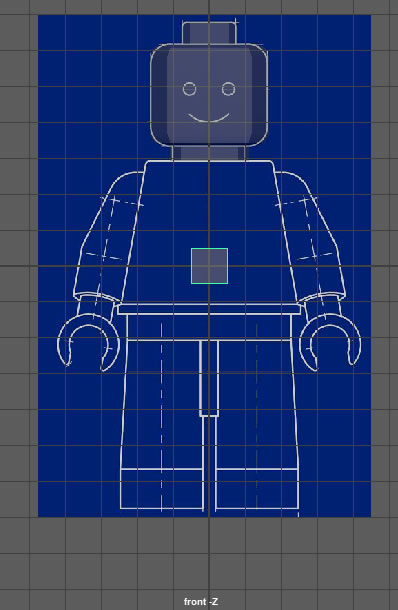
I have scaled the cube to create the right shape for the body.
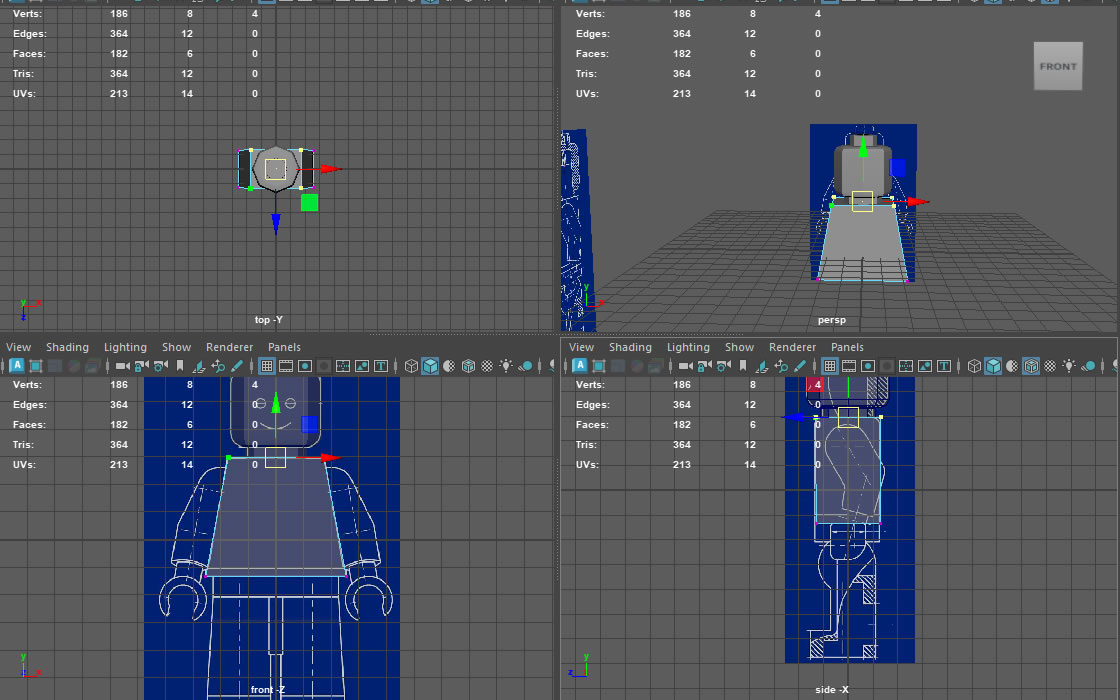
I then made a cut in the body for the belt, and then changed the size of the belt by extruding outwards on all sides.
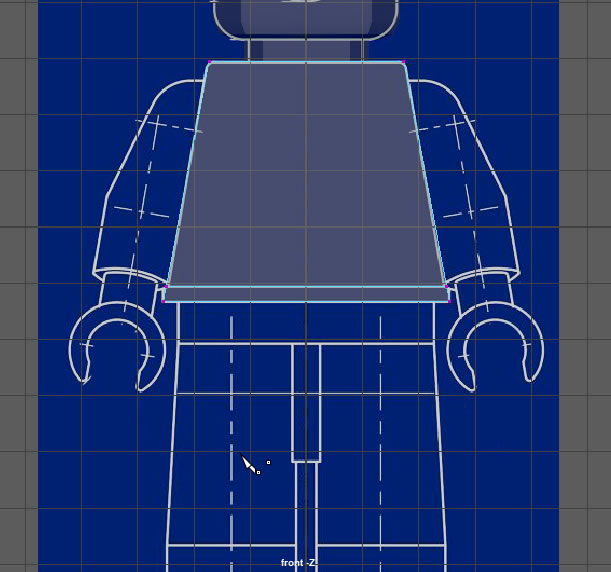
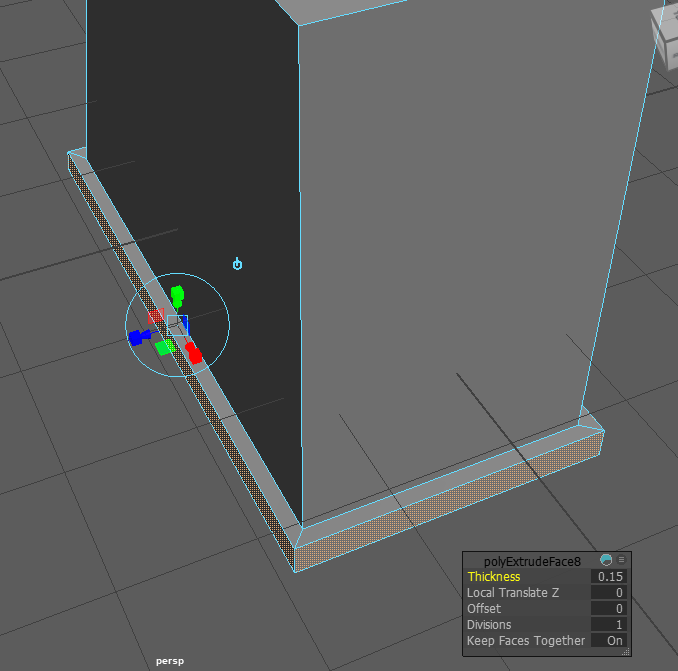
I added edge loops to the edges of the body, so when smoothed out it would stay boxier.
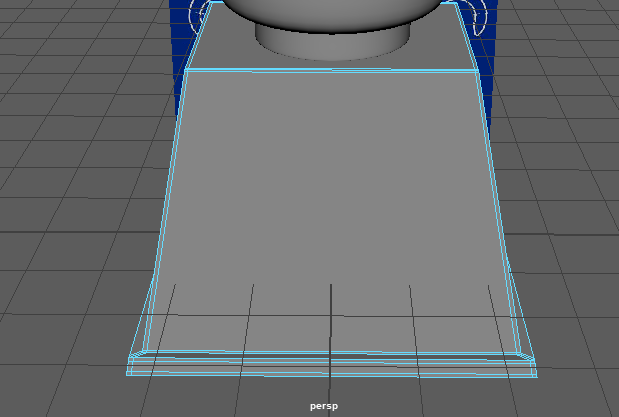
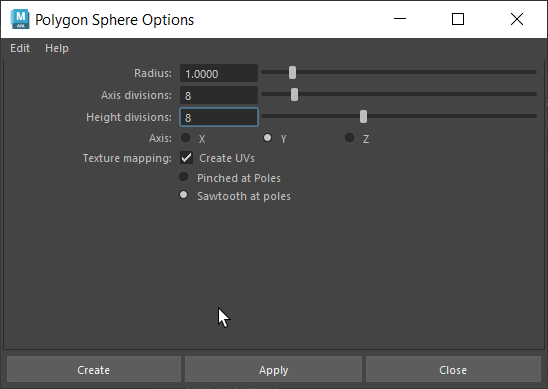
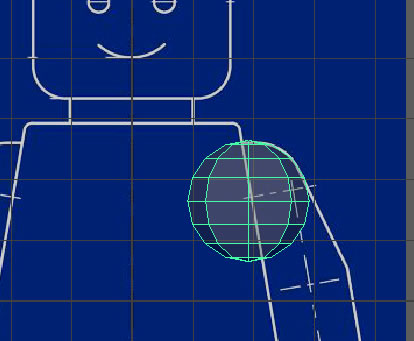
To create the arms, I first created a sphere with these dimensions, moved it into place and removed the bottom faces to create a semi-circle shape.
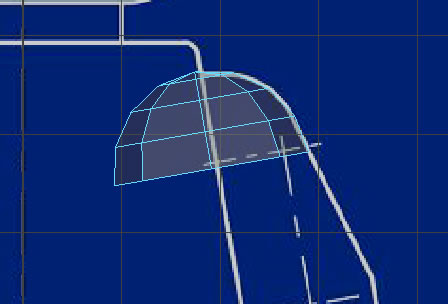
I then went into face mode, and selected the left side of the sphere and made it a straight line. I then moved the shape in to fit the blueprint.
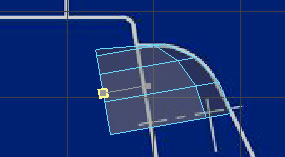
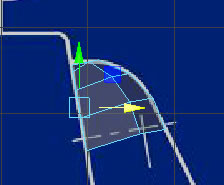
To create the arms, I first created a sphere with these dimensions, moved it into place and removed the bottom faces to create a semi-circle shape.

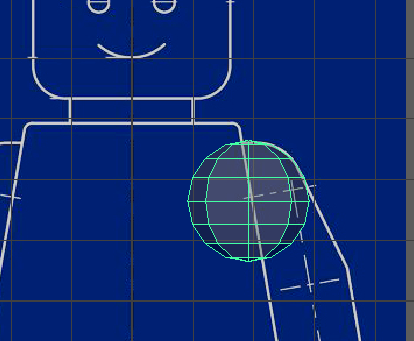
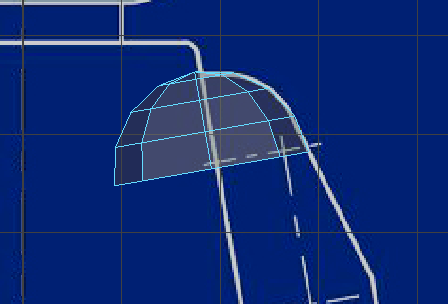
I then went into face mode, and selected the left side of the sphere and made it a straight line. I then moved the shape in to fit the blueprint.
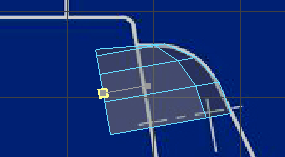
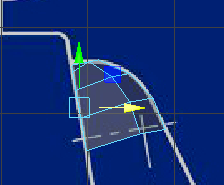
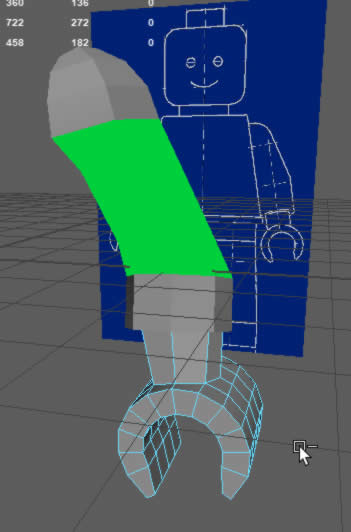
I created the bottom of the arm and then adjusted it to fit the blueprint.
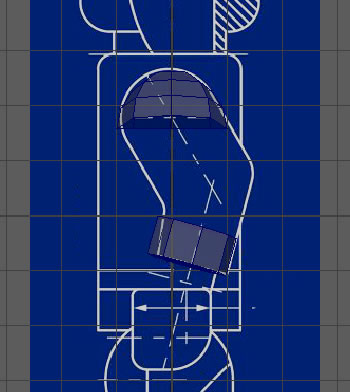
I then combined the top of the arm and the bottom of the arm and then bridged them together.
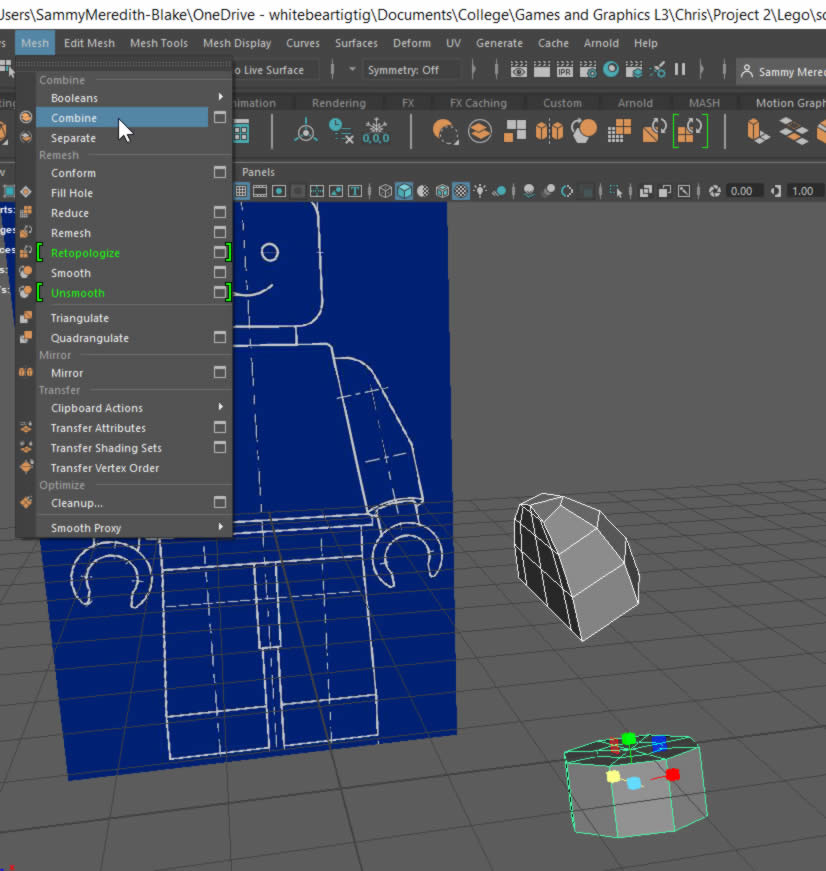
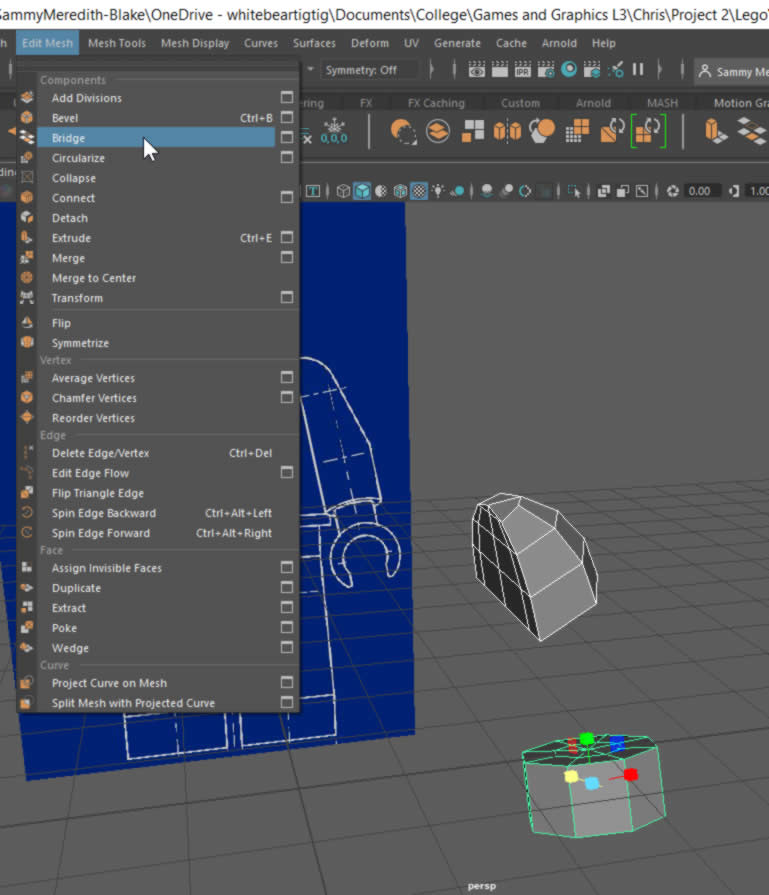
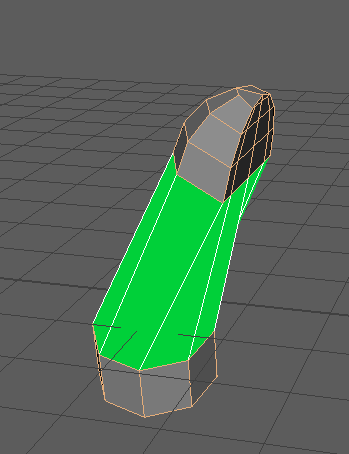
Next, I adjusted the twist on the bridge until it looked more like a natural arm.
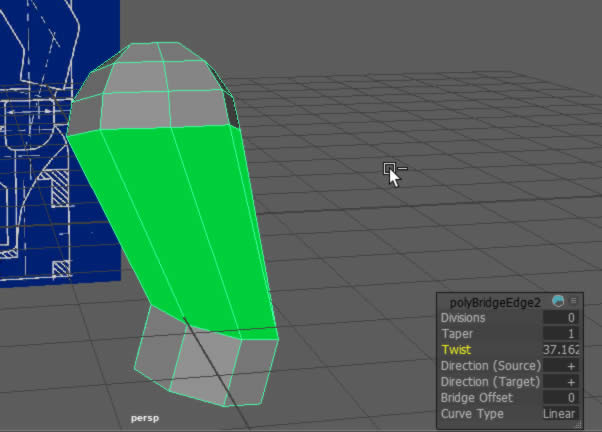
After that I extruded inwards to create an indent.
For the hand, I first created a cylinder, and lined it up with the hand in the front view.
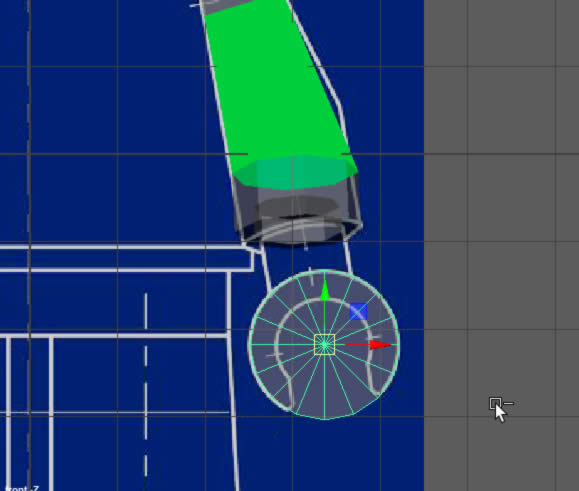
Next, I deleted 4 of the faces in the front view, and then deleted the other faces in the front view.
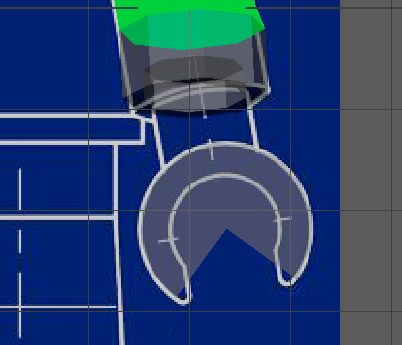
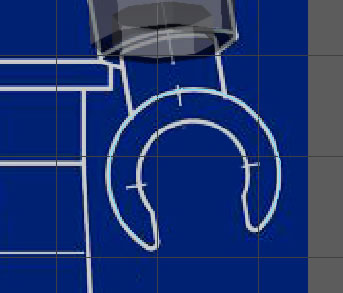
I went into the side view and adjusted the size of the shape in vertex mode, to make it more claw like.
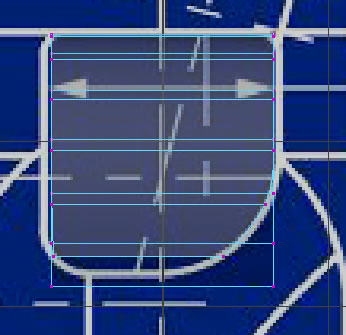
I then extruded inwards to thicken the hand and adjusted the vertexes again.
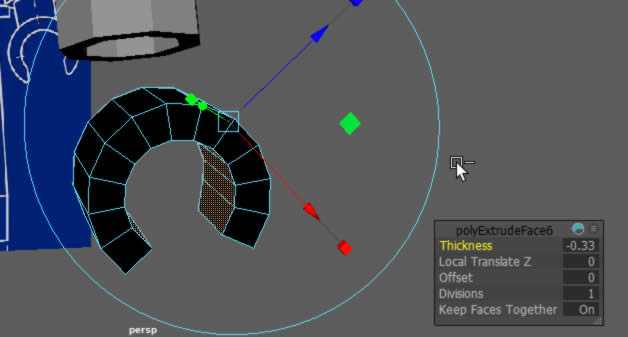
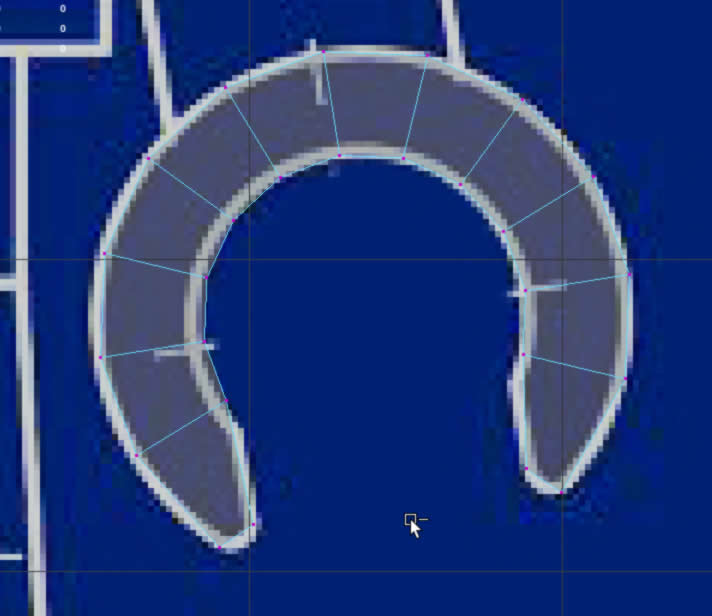
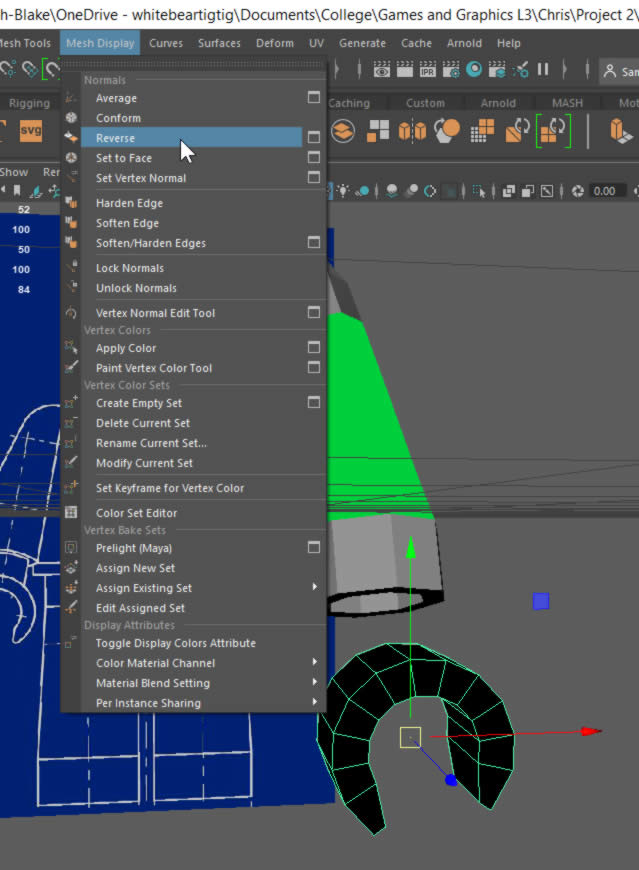
Next, I went back into object mode and reversed the mesh display, this will bring it back to normal, where it isn’t inverted.
The hand shape needs more geometry, so I used the multi-cut tool to add more.
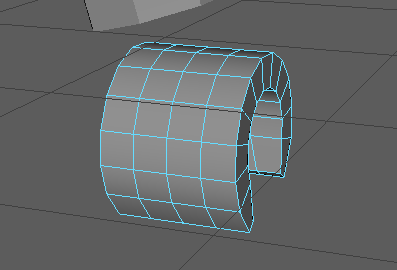
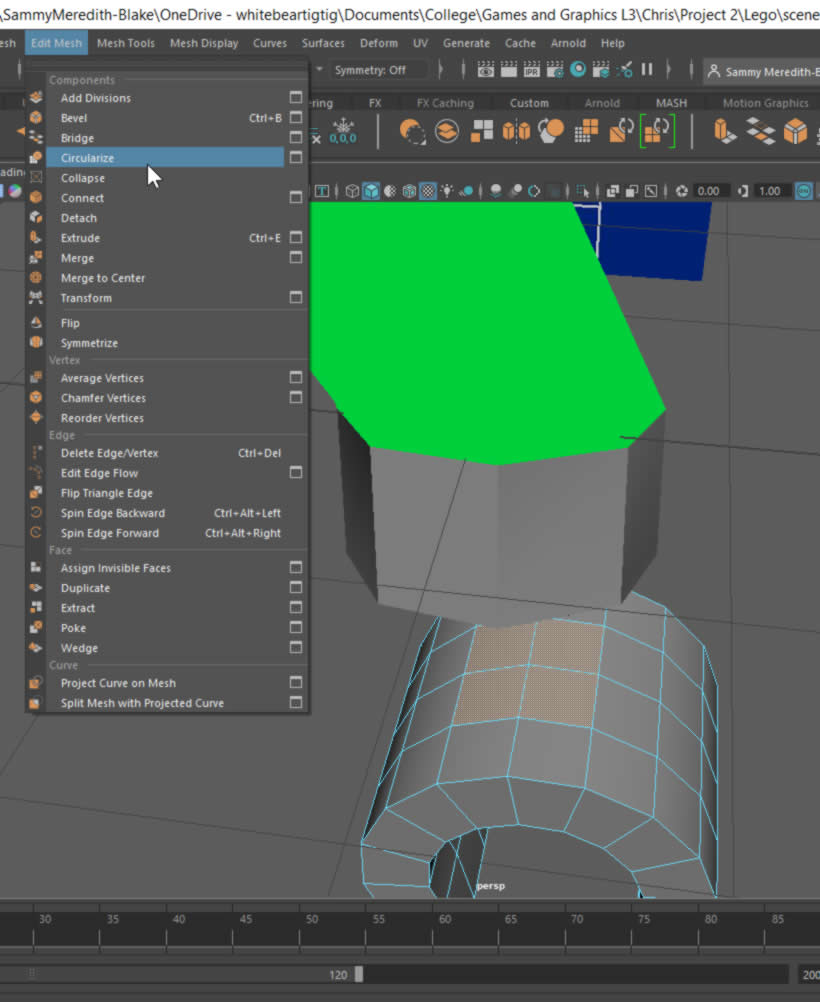
Now to create the wrist, to do that, I selected the four faces on top of the hand, and circularized them, setting the alignment to Surface (per-vertex) and the Radial Offset to 0.1.
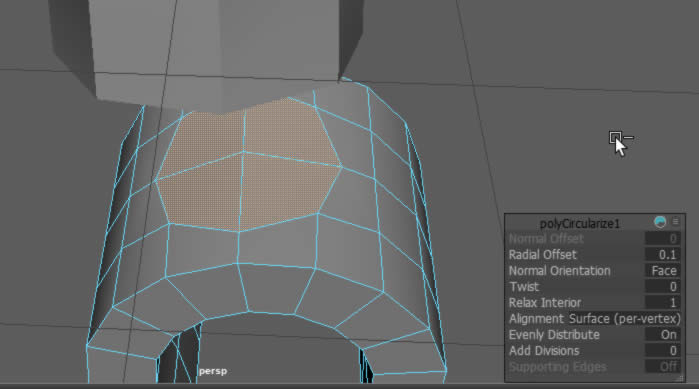
After that I extruded the circular shape to make a cylinder shape, this is the wrist.
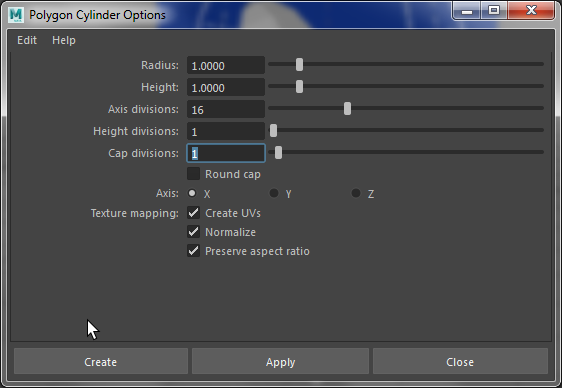
I have created a cylinder with these dimensions to make the pelvis and removed edges to make it all into quads.
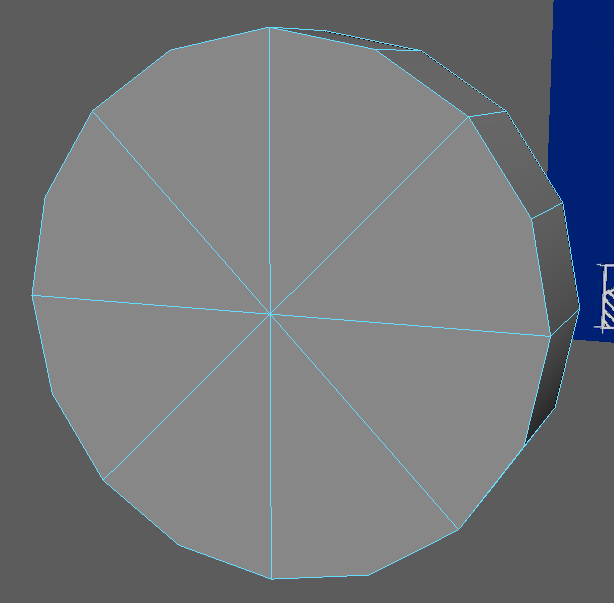
I then extruded from the top, and used the scale tool to flatten the top, so the surface is flat. I have also added an edge loop about 20% up from the bottom of that extrusion.
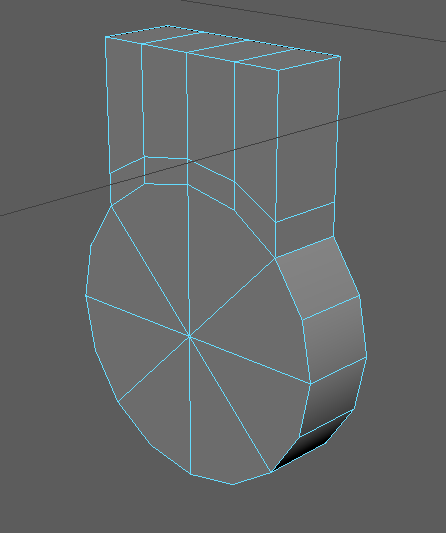
I then extruded the side faces outwards to the width of the legs on the blueprint.
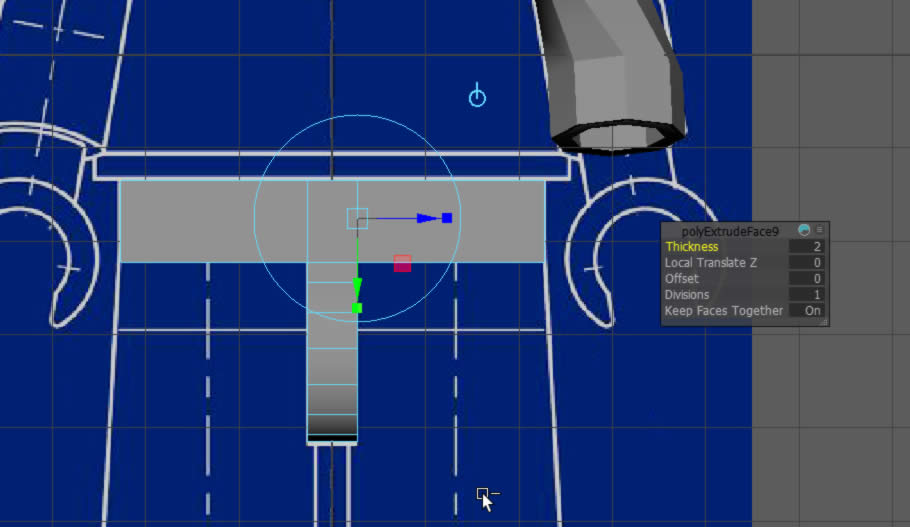
I then extruded the other sides to fit the blueprint on the side view.
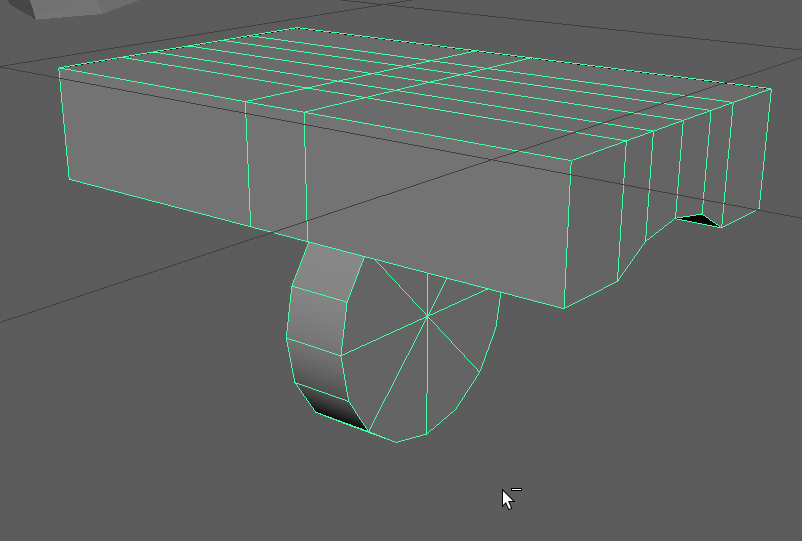
After that I bevelled the edges on the round shape with these settings.
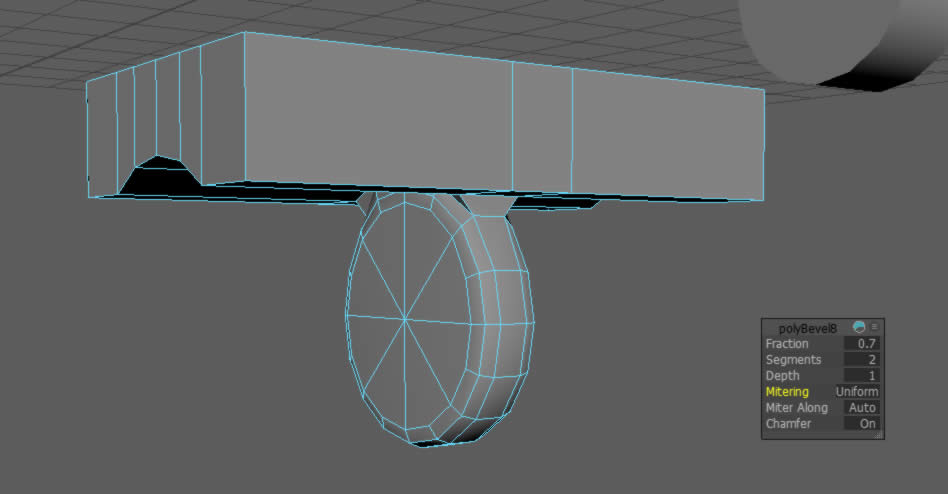
Next, I added edge loops to the rectangular shape on top, this is to smooth the edges.
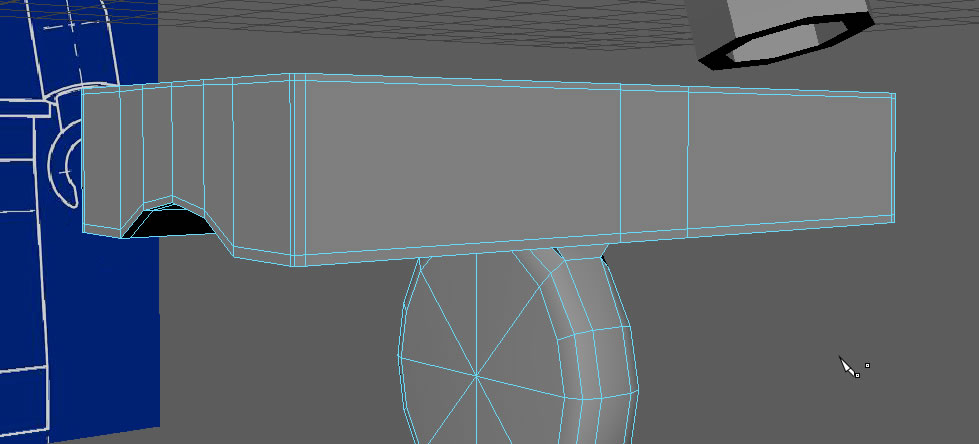
I then created another cylinder with the same dimensions and scaled it to fit the blueprint.
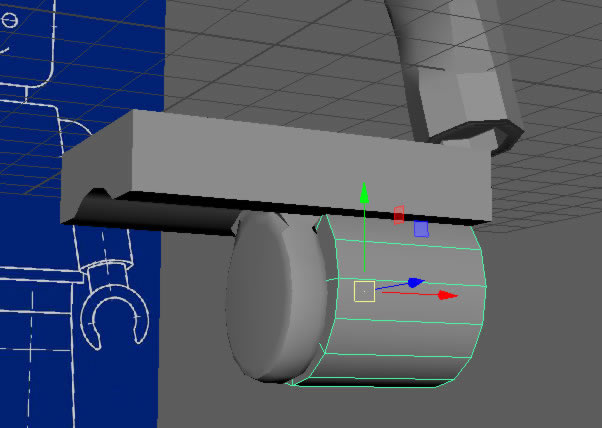
I then extruded downwards to create a leg and flattened using the scale tool like before.
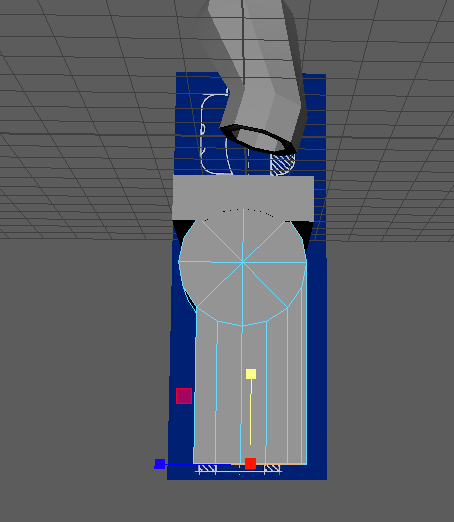
After that I added an edge loop, this one is curved because it is extruded from a cylinder, to flatten it I used the scale tool again.
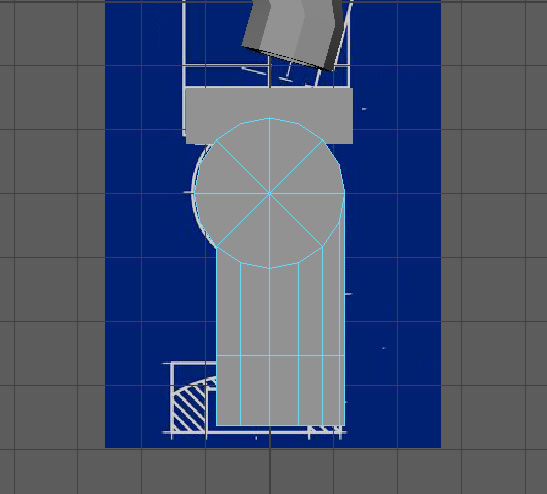
To add a foot shape, I selected the face, and extruded until it lined up with the blueprint.
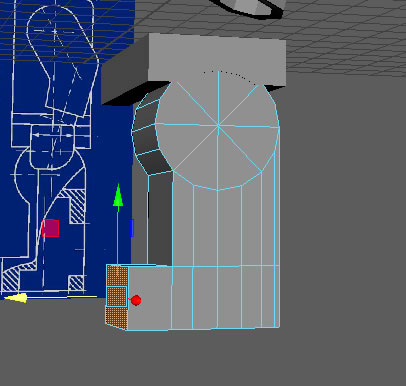
I then bevelled the two sides of the leg, to make it look smoother, and added more edge loops in to have the same effect.
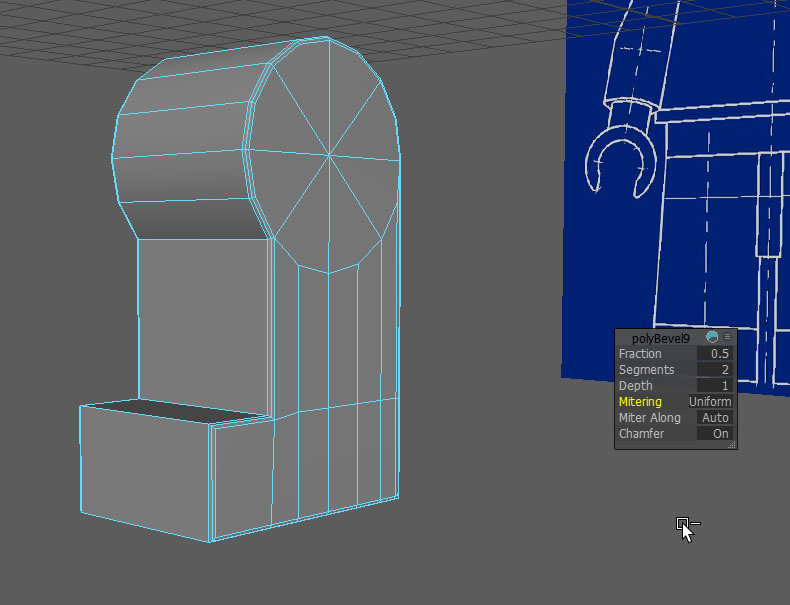
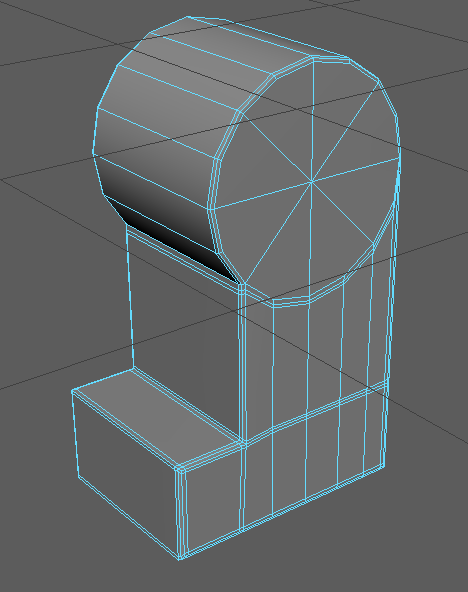
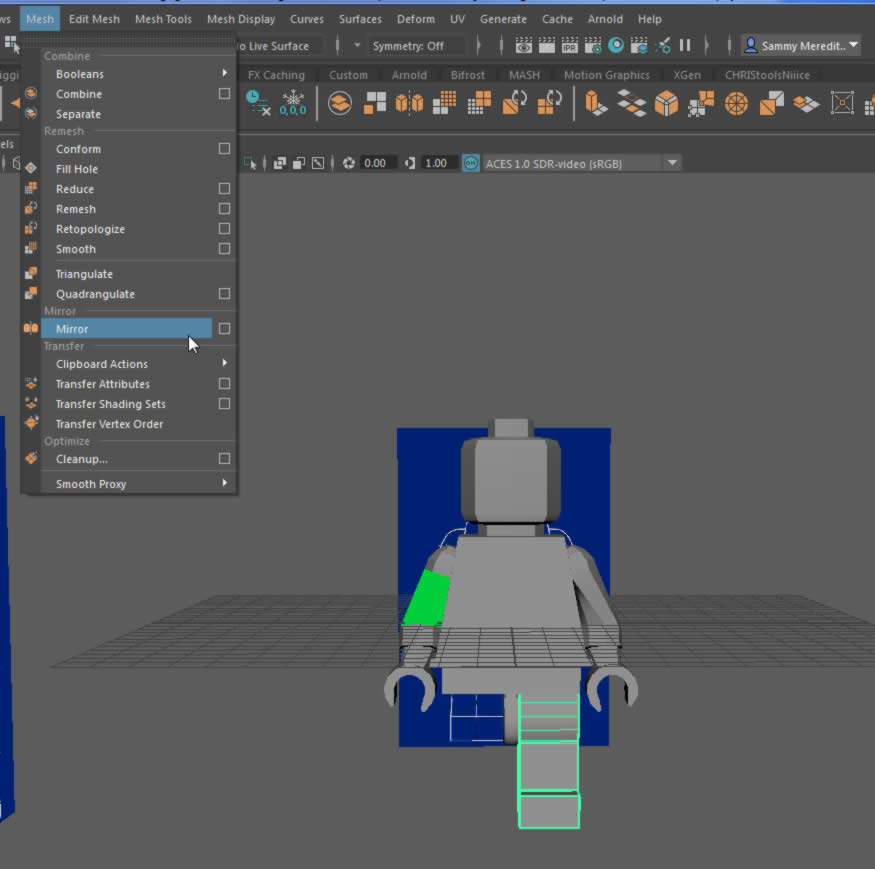
I mirrored the arm, hand and leg to the other side, this saves me from having to do it manually and wasting a ton of time.
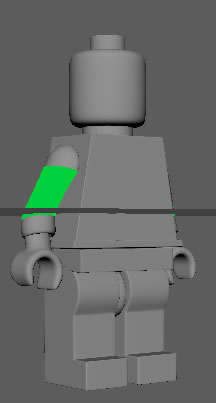
I did some finishing touches such as adding edge loops and just cleaning up the model, and the Lego figure is done, here is the final model.
Silhouette Drawings
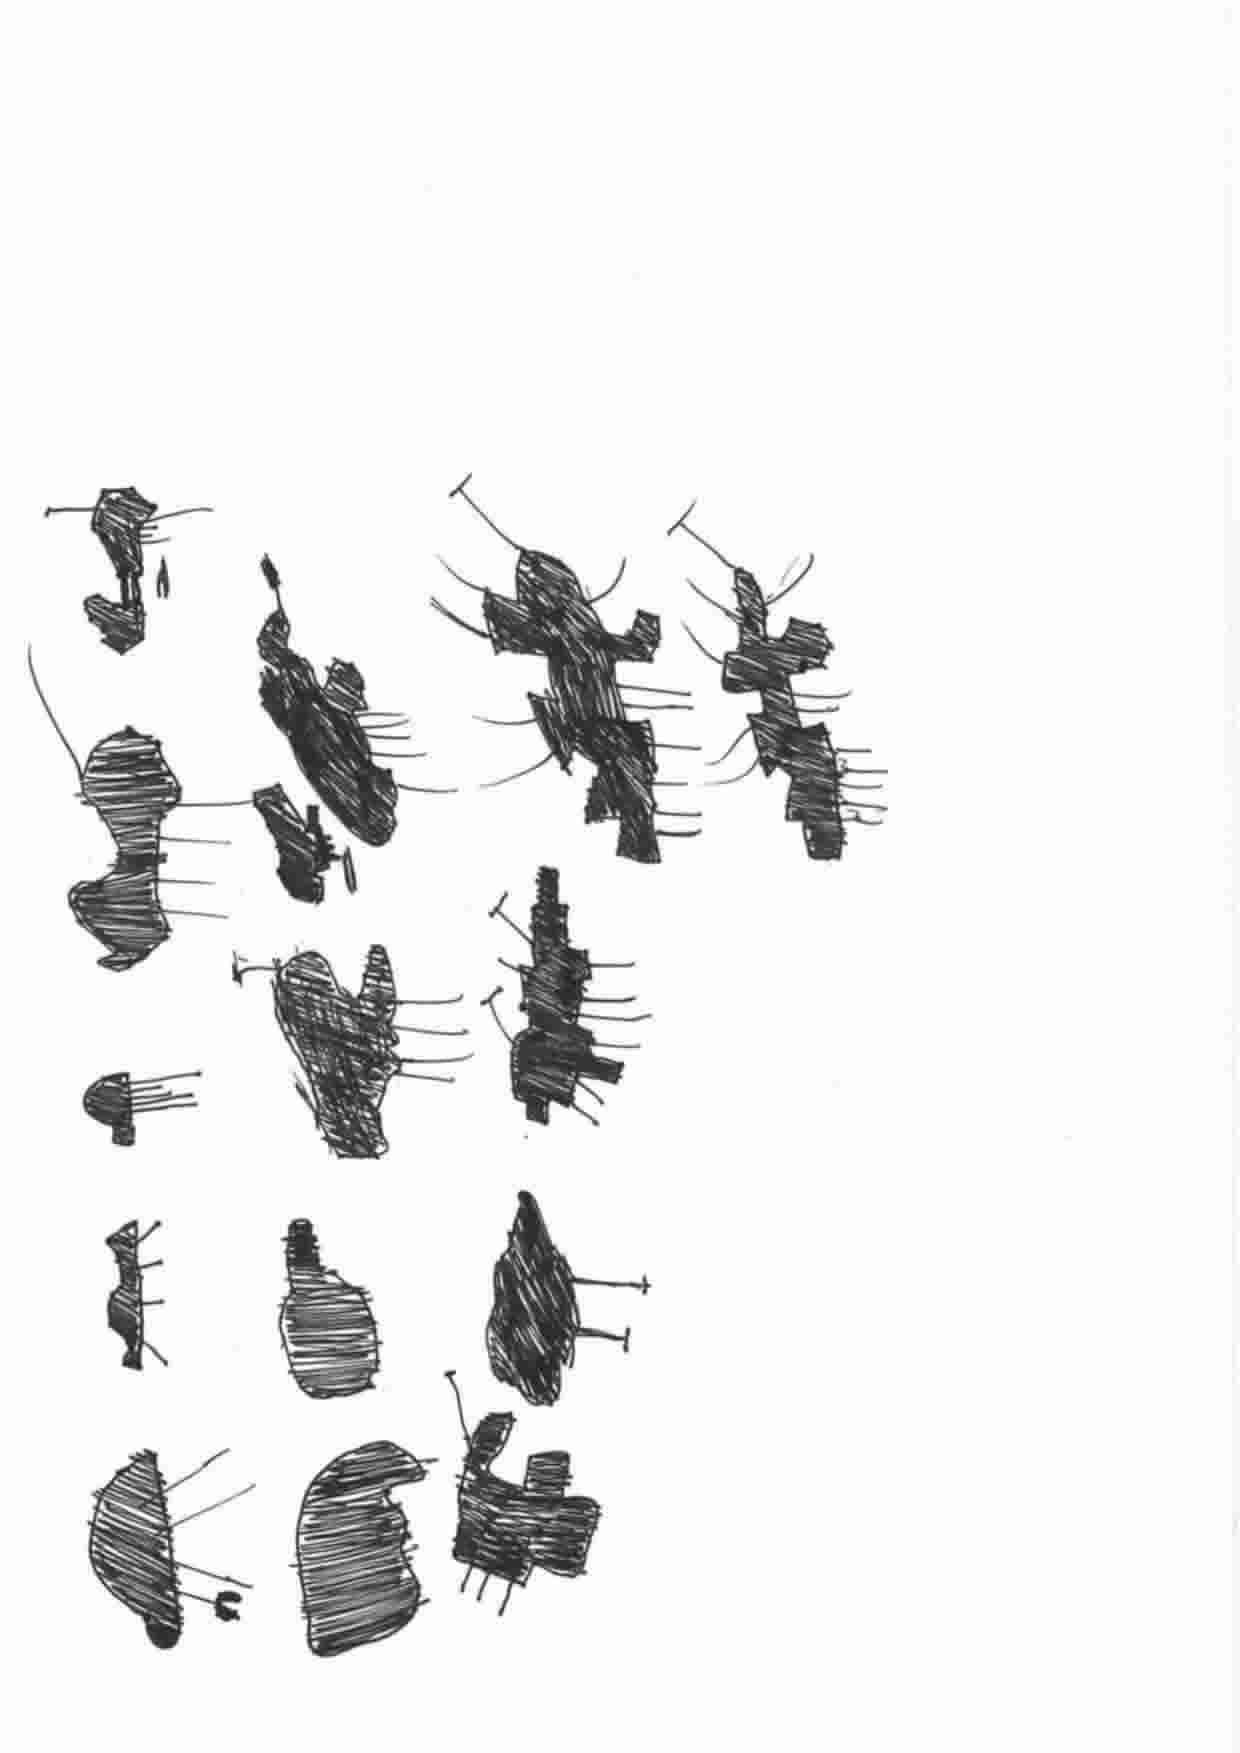
These are silhouette drawings of a space probe designed for landing and mining on an asteroid, there are many different designs here, some of them are better than others.
There was a class vote done and whilst it was close, there was a winner, it was the weird bird shaped one.

These are silhouette drawings of a space probe designed for landing and mining on an asteroid, there are many different designs here, some of them are better than others.
There was a class vote done and whilst it was close, there was a winner, it was the weird bird shaped one.